


 New Code Sent!
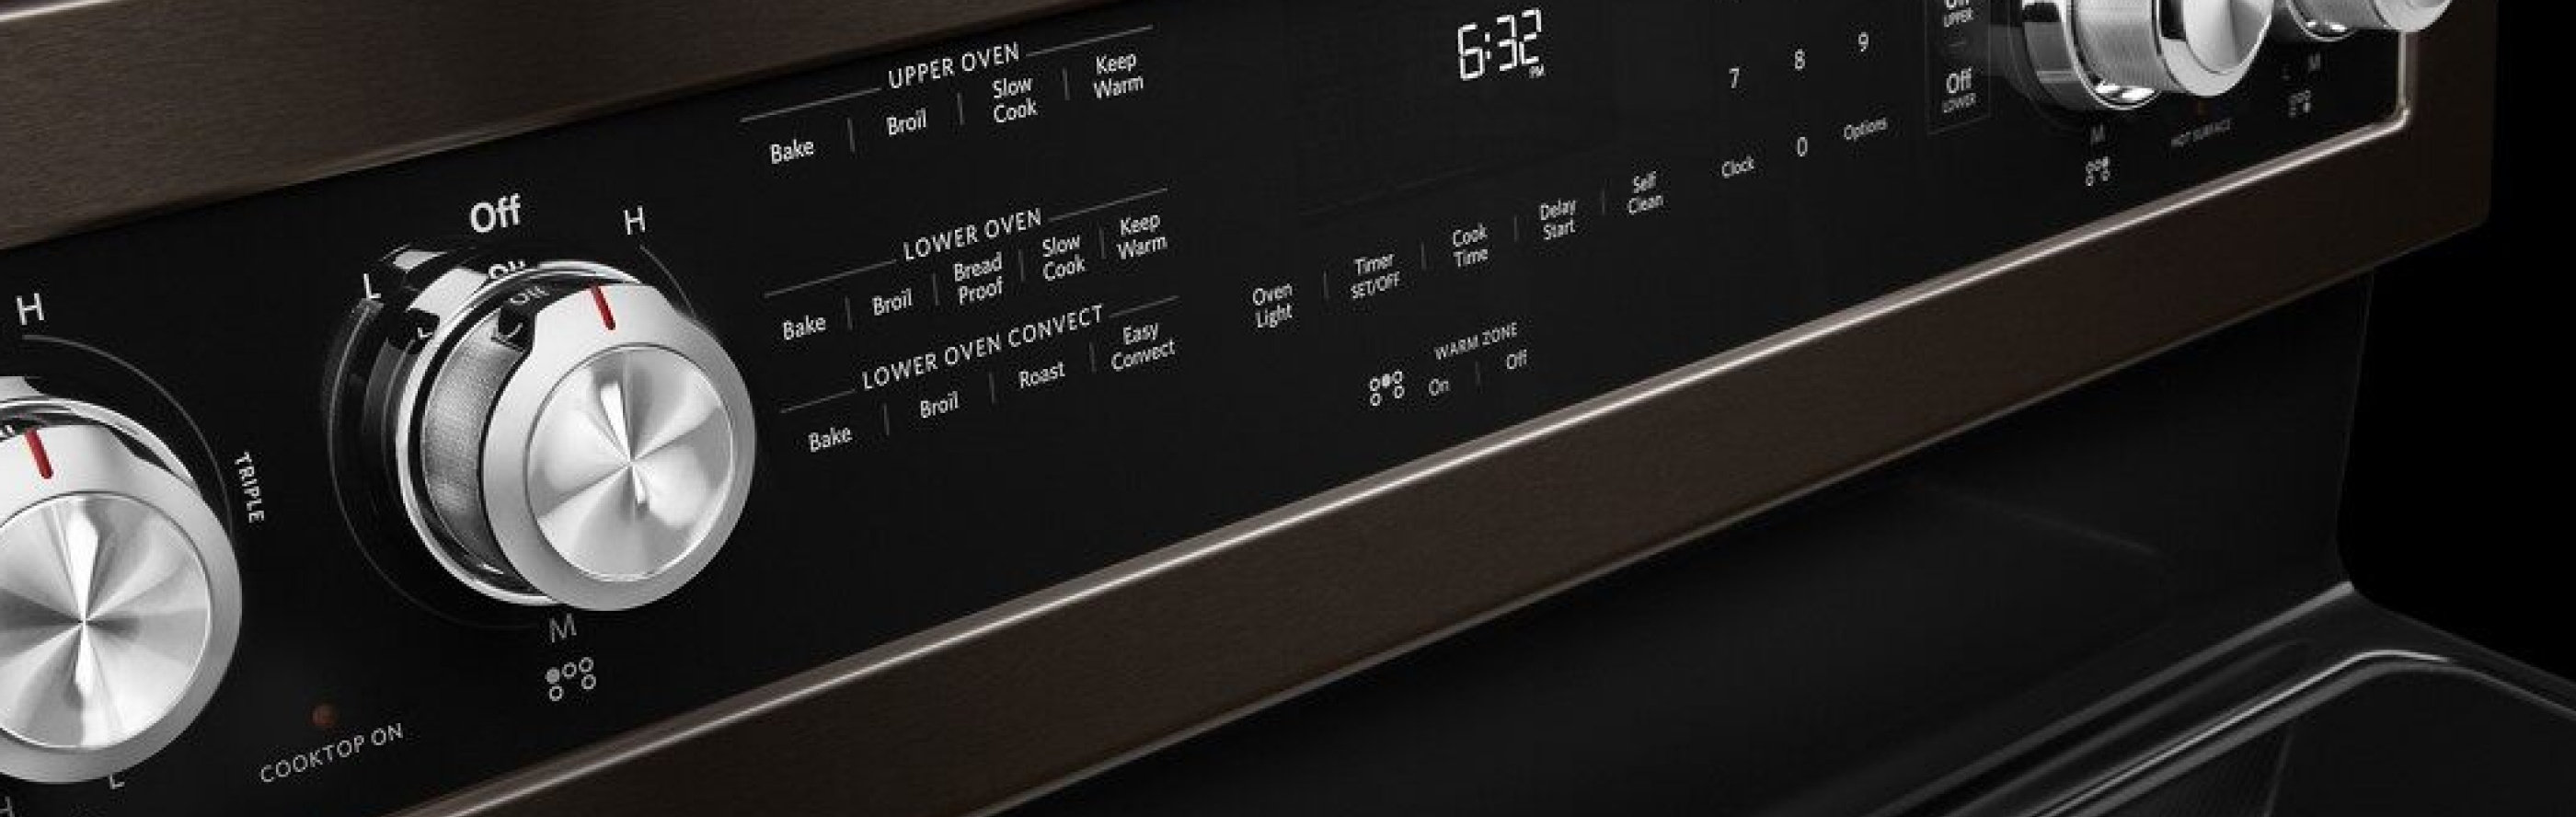
20 oven settings & symbols guide
Ovens and ranges are some of the most important appliances in the kitchen. Understanding your oven controls and their capabilities is key to getting the most out of your appliance and creating well-cooked dishes. Use this guide to discover more about oven settings and how you can use them to optimize your results and enhance your creativity.
Oven settings explained
Oven settings are designed to bring out the best in your cooking with specific temperatures and functionality for different kinds of dishes and recipes. Many ovens today come with a number of oven settings that might include some or all of the following:

1. Preheat
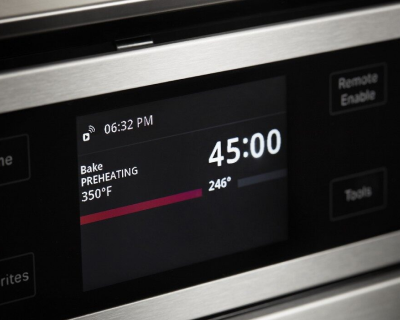
The preheat setting will heat the oven to a specific temperature range to help ensure that your dishes will begin cooking at the correct temp. The oven temp will be slightly higher than your set temperature to offset the heat lost when your oven door is opened.
Select KitchenAid® ovens feature Even-Heat™ Preheat to ensure the entire oven cavity, including walls and racks, is fully heated to help prevent cold spots..
Oven preheating tips
An oven will normally heat in 12-15 minutes. Many of today’s ovens are larger than older models and may take longer to preheat. However, many newer models also have features that enable them to preheat faster than ever. It depends on the make and model.
A hidden bake element provides a buffered heat and may take longer to preheat than an exposed bake element.
Low/cold room temperature will also potentially cause longer preheat times.
For optimal performance, place food in the oven as soon after the preheating signal has sounded as possible.
- Avoid leaving the oven door open for an extended period of time.
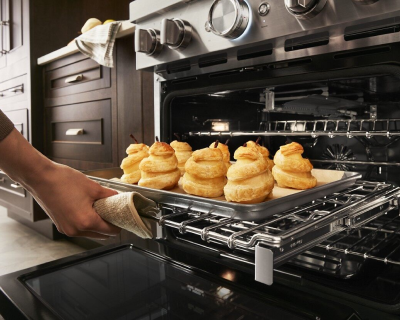
2. Bake
The bake setting is one of the most commonly used oven controls. Baking uses dry heat at lower temperatures from the oven’s top and bottom elements to slowly cook unstructured foods such as batter or dough, gently browning the surface while solidifying the interior.
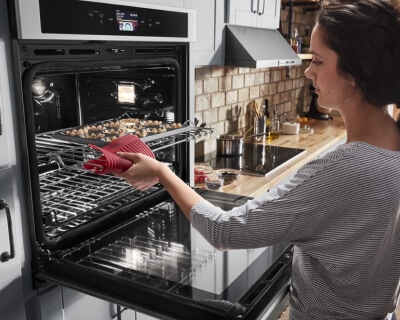
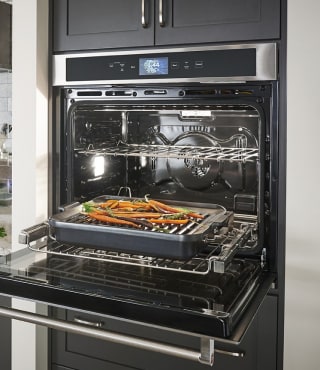
3. Convection bake
Convection bake settings use a fan to circulate hot air throughout the oven cavity for even cooking across multiple racks. These settings are great for batch baking foods like chocolate chip cookies, where multiple racks are being used simultaneously. You can also use convection bake settings to cook through layered pasta dishes or to provide the dry environment needed to experiment with recipes involving toasted or dehydrated foods.
Select KitchenAid® wall ovens and ranges feature Even-Heat™ True Convection. This unique bow-tie design with a heating element and fan circulates hot air throughout the entire oven, providing optimal temperatures for crisp, flaky baked goods, juicy, well-browned roasts and caramelized vegetables.

4. Steam bake
Some ovens may include a steam function to help you create moist, delicious recipes. This setting utilizes hot steam pulled from a broiler to cook food, rather than hot air. Steaming in an oven is the ideal way to create select baked goods, such as crusty breads or desserts. The steam helps add moisture to recipes, while at times helping create a crispy exterior.
Select KitchenAid® ranges and wall ovens feature Steam Bake, which provides additional moisture during baking, so you can enjoy Basque cheesecake and other delicious desserts.
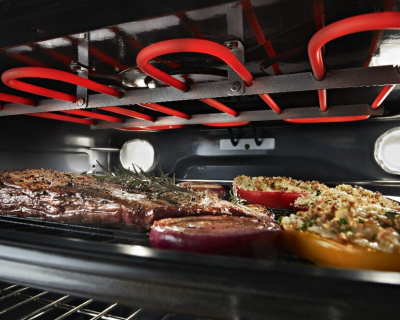
5. Broil
The broil setting cooks food quickly with direct heat from the top element, typically at 550℉ (289℃) and produces a seared finish that’s similar to grilling. The closer your food is to the top heating element, the more quickly the top will sear. Dishes that need to be cooked through shouldn’t be placed too close to the element, as this could result in a dish that’s burned on top and undercooked on the inside.
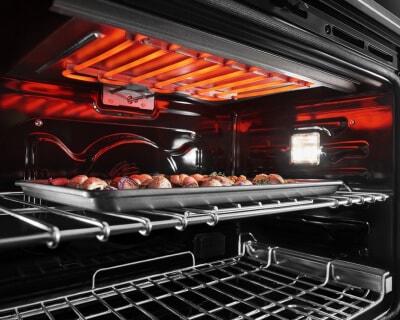
6. Convection broil
Your range may or may not offer a convection broil setting, but if it does, you can use it for broiling thicker cuts of meat or poultry that are more challenging to cook through. During this cycle, the broil element will intermittently turn on and off, but the fan will continuously circulate the hot air. Remember: Using a broil setting like this one will sear your food at a high temperature—think 550℉—so take caution not to burn your dish.
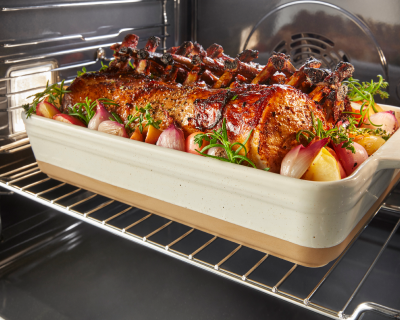
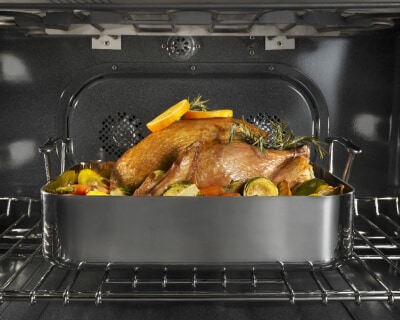
7. Roast
Like the bake oven setting, roast uses dry heat from the top and bottom elements to heat food; the difference is that roasting uses higher temperatures to brown the surface and create flavor in foods with more structure, like proteins and veggies. Learn more about the differences between bake vs. roast vs. broil settings.
8. Convection roast
If you’re tackling a heavier dish that requires even cooking and a crispy finish, consider convection roast. This type of convection cooking uses a fan to circulate hot air throughout the oven cavity. Try this setting on thicker dishes like lasagnas or casseroles to get that crispy, brown cheese on top.

9. Slow cook
Slow cooking involves cooking food on low heat for long periods of time to create a delicious, fork-tender meal, relying on the food’s natural moisture content. Though you can utilize a standard oven and a covered pot to slow cook your favorite recipes, some appliances may offer specialized settings to help create an ideal slow cook environment.
Select KitchenAid® ranges are equipped with No Preheat Slow Cook, a setting that seals in the flavors of juicy roasts, stews and braised foods for savory comfort meals without the need for a countertop slow cooker. Select KitchenAid® wall ovens feature No Preheat Slow Roast, which cooks tender meats, pastas and much more without the hassle of a separate appliance.
10. Convection cooking conversion
Since convection cooking uses a lower temperature compared to regular baking, broiling or roasting, a convection conversion setting can help you make necessary temperature adjustments. Some ranges and ovens may offer settings that take the guesswork out of convection cooking by converting conventional settings for recipes to convection settings for you, like the KitchenAid® EasyConvect™ Conversion Setting on select models.

11. Grill
When outdoor grilling season comes to an end, you still have options for searing flavorful burgers and steak over direct heat. That’s right—with the proper pan and temperature, you can now grill in your oven. Set your oven to a high temperature (400-500℉) and preheat it with your grill pan inside to make sure your cooking surface is as hot as the range. Once your grill pan is hot, place the meat directly on top.
Following a recipe can help determine flip and turn times for your dish.
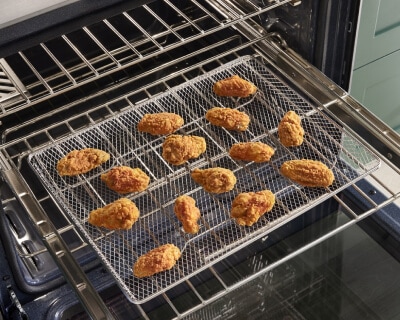
12. Air fry
In the last few years, air fryers have become increasingly popular. Air frying provides an alternative way to eat crispy, fried foods without the need for all the oil that is used in deep frying. And now it’s possible to air fry food in some ovens instead of using a separate appliance.
If your oven has an air fry setting, you can create crispy, lightly fried foods ranging from chicken to french fries, but in a larger capacity than a countertop air fry appliance. This setting is similar to convection cooking, as they both use a fan to circulate hot air; however, your air fry setting often won’t require you to preheat the oven. You will also want to make sure to use the designated air fry basket when cooking your dish.
13. Bottom heating
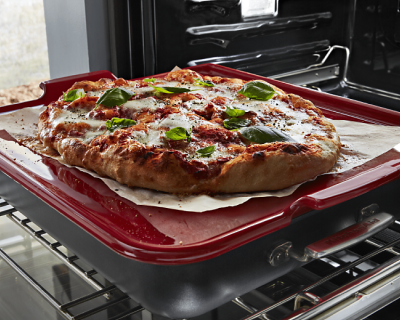
Some ovens feature bottom heating that utilizes the lower heating element of the oven and is designed to cook the base of the dish first. This setting can be ideal for cooking pizzas and pastries that require a crisp, crunchy base.
Baking stones can also help achieve similar results. The KitchenAid® Smart Oven+ Baking Stone Attachment can help create restaurant-style pizzas, tarts and more.
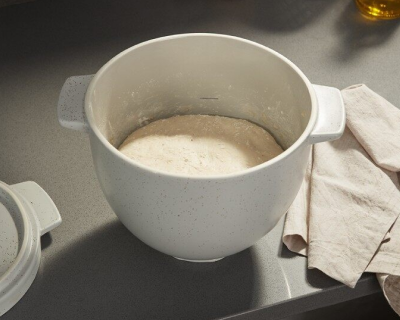
14. Proof
Some ovens, like select options from KitchenAid brand, offer a special proof setting for bread bakers. The proof function prepares dough for baking by creating an ideal moist, warm environment in the oven, which helps activate the yeast in homemade bread and other pastries.
Learn more about proofing ovens.
15. Keep warm
The keep warm setting helps maintain a dish’s temperature without overcooking it. Dishes like sides, breads, casseroles and desserts can be kept warm before serving with this function. Learn more about how to keep food warm in the oven before serving.
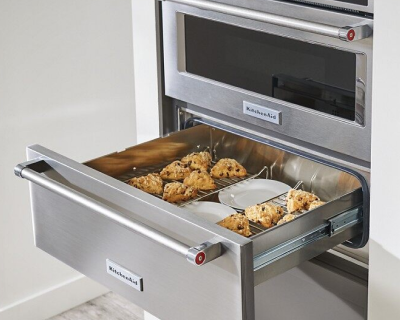
Warming drawers are another useful tool for keeping dishes warm if you’re not serving them right away. Select KitchenAid® warming drawers can be used for proofing and slow cooking meats and poultry as well.
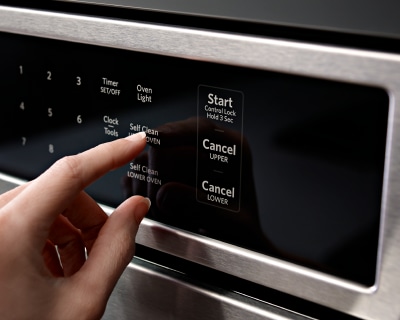
16. Self-clean
Ovens with a self-clean setting are ideal for deep cleanings. The setting uses very high temperatures to burn cooked-on food to an ashy consistency—without chemicals—making it easy to wipe off oven interiors.
Select KitchenAid® ovens feature a Steam Clean & Self-Cleaning Cycle, as well. The Steam Clean Cycle, perfect for quick, routine maintenance, helps loosen cooked-on food in under an hour. Simply add water to the bottom of the oven and wipe down after the cycle. For a deeper clean, the high-temperature Self-Clean Cycle powers through baked-on spills, leaving the oven cavity clean with just a final wipe-down.
17. Sabbath mode
Sabbath Mode is designed for those who follow kosher dietary guidelines.
This oven setting ensures food remains heated without the need to manually adjust the appliance on the Sabbath day. When the Sabbath Mode is set on select KitchenAid® models—including the KitchenAid® 27" Combination Microwave Wall Ovens with Air Fry Mode—only the Bake cycle will operate. All other cooking and cleaning cycles are disabled. No tones will sound, and the display(s) won’t indicate temperature changes. When the oven door is opened or closed, or the light switch activated, the oven light will not turn on or off, and the heating elements will not turn on or off immediately.
18. Timer
Many oven timers can be set in minutes and seconds or hours and minutes. They’re designed to count down the set time. Timers take the guesswork out of cooking and are especially helpful for reminding you when the temperature needs to be adjusted or when a dish needs to be rotated halfway through.

19. Clock
It’s easy to confuse the clock with the timer. The clock displays the time of day when the oven timer isn’t in use. The clock can be helpful while baking or cooking, allowing you to manually keep track of start times or how long dishes have been resting.
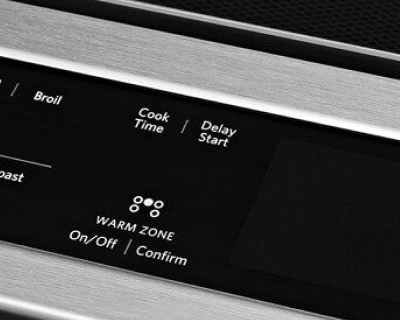
20. Delay start
Delay cooking allows the oven to be set to turn on at a certain time of day to a desired temperature. Simply input a time and temp before you leave the house in the morning—or before the party starts—and the oven will start preheating to your selected temp at your selected time. Before programming, make sure the clock is set to the correct time of day.
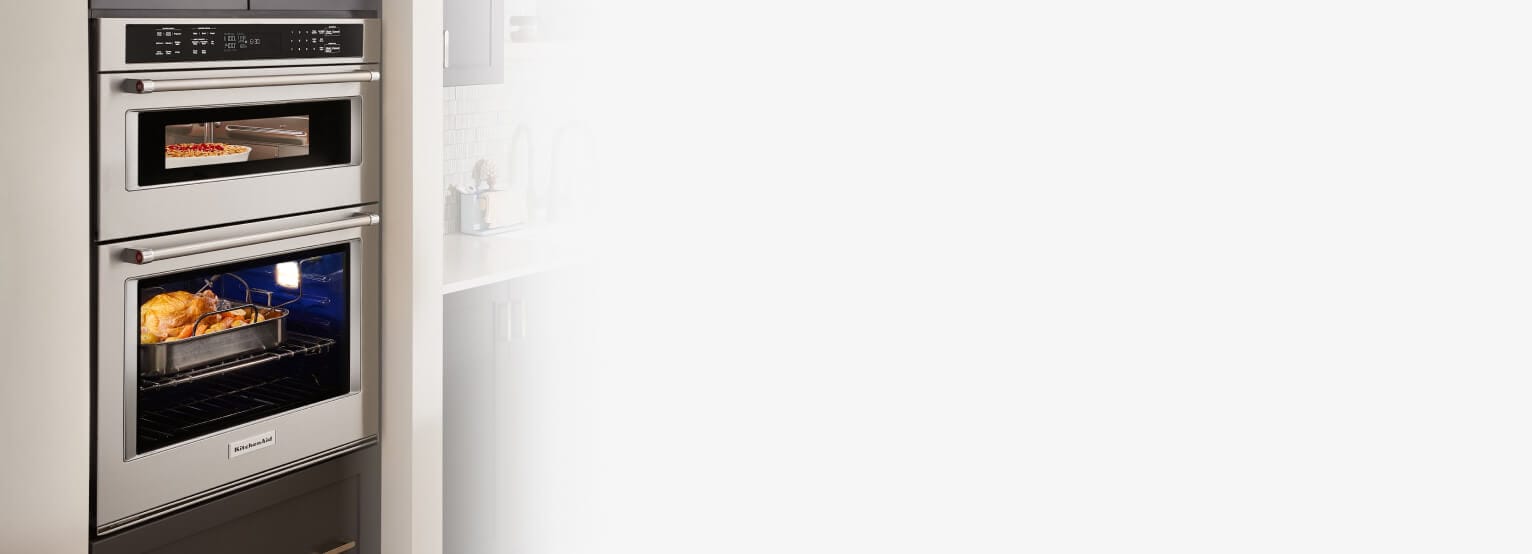
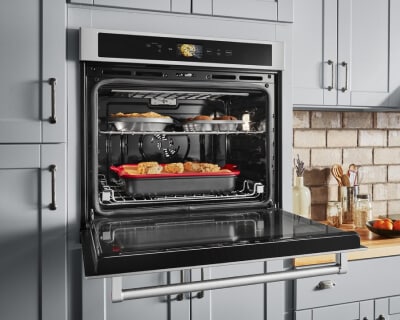
KitchenAid® wall ovens
Oven designs that inspire
Shop single and double built-in wall ovens to find the option that inspires your creativity and matches the way you make
Discover KitchenAid® wall ovens
Fuel your culinary passions with a variety of features and settings available on KitchenAid® wall ovens. Find unique presets on select single, double and combination wall ovens from KitchenAid brand, such as Fresh Pizza Mode, Slow Cook and even Proofing Mode. Or use Assisted Cooking Modes for suggestions for cook times and temperatures on an easy-to-navigate touch screen so you can explore new recipes with confidence.


What do different oven symbols mean?
There are oven setting symbols that provide a visual shorthand for oven functions. Some of the most common cooking symbols might include:
A bar on the bottom and the top, indicating that both elements will be used with this setting for conventional heating
A single lower bar for bottom heat only
A fan for convection heating
A zigzag line at the top may represent the high heat emitted from the top element for broiling
A plate graphic with steam lines above it may indicate the symbol for the Keep Warm setting
Note that the exact symbols often vary by brand and model.


Which oven settings should I use?
To optimize results, it’s important to follow your recipe for the right temperature and settings. Understanding the correct oven controls to use will help you create the tenderest meats, the flakiest pastries, the crispiest sears, the lightest and airiest cakes and more.
Here is some tasty recipe inspiration using different oven settings and controls:
Pizza & tarts
Bottom oven heat or pizza stones are ideal for creating crispy crusts. You can also use a baking stone to create different types of recipes, including desserts and breads. To make it simple to create homemade, restaurant-style pizzas from the comfort of your kitchen, select KitchenAid® ranges and wall ovens have a Fresh Pizza Mode, which cranks the heat to 550°F for delicious results.
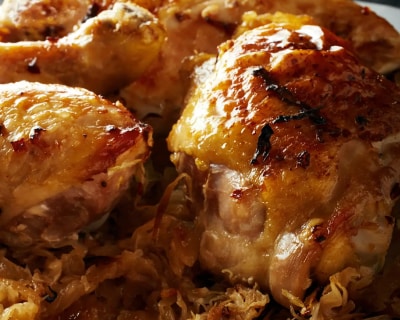
Chicken
Whole chicken is typically roasted, while chicken parts are commonly baked. Depending on your oven’s settings, you may also have the option to air fry chicken using air fry mode.
Turkey
Roasting is the tried and true way to cook this holiday classic. But turkey isn’t just for the holidays. You can also bake turkey meatloaf for a lean and elevated take on a family favorite. Or try air frying turkey for a new take on a classic recipe.
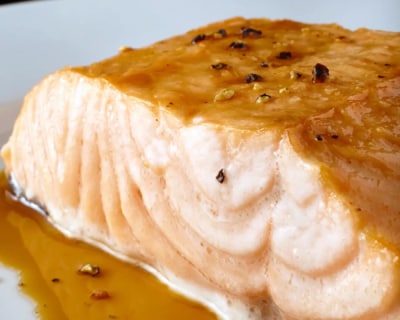
Salmon
Salmon can be broiled quickly and easily in a KitchenAid® wall oven. It’s also possible to air fry salmon if your oven has air fry mode.

Casseroles & lasagna
Most casseroles like lasagna and baked ziti can use the bake oven setting to help stabilize the interior of the dish and create an evenly browned surface.
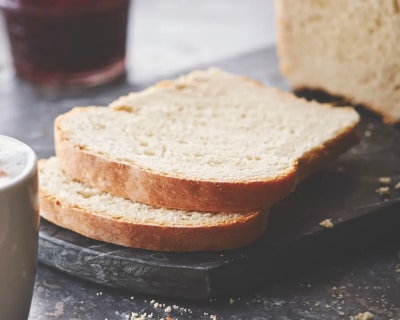
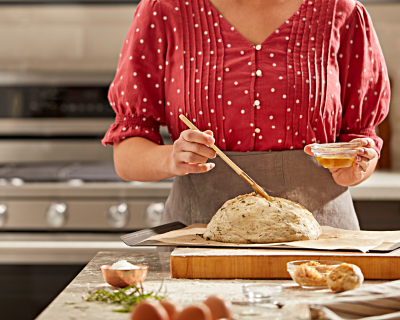
Bread, cakes, cookies & brownies
Many baked goods use the bake oven setting with the rack placed in the middle of the oven to help create delicious treats. Whip up the dough for bread in your KitchenAid® stand mixer before baking it in the oven. Then slather the warm bread with homemade butter.
Or, use the convection setting to bake up multiple trays of rich, yummy cookies or brownies for the next big party.
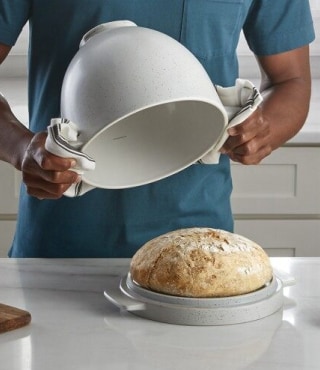
Baking bread?
Considering convection?
Tips for using oven settings
Use the bake setting for items like casseroles and baked goods.
Proteins, vegetables and dishes that require higher temps can be cooked with a roast setting in the oven.
The convection setting is optimal for multi-rack cooking, as well as cooking short doughs. The fat will melt quickly and create steam resulting in light, flaky pastries and crusts.
Use broil for toasting, creating a sear or melting cheeses.
When using the convection setting, check for doneness with 20-25% of time left. Select KitchenAid® ovens feature the EasyConvect™ Conversion System that converts conventional settings to their convection equivalents, helping you get exceptional results when experimenting with new recipes or familiar favorites.
To help maintain consistent temperatures, avoid opening the oven door. Frequent door opening during cooking releases oven heat and can result in longer cooking times.
If the oven is not thoroughly preheated, it can cause excessive top heat to foods and result in over-browning surfaces.
Use all metal pans (stainless, carbon steel or cast iron) when broiling to avoid damaging less durable cookware under intense heat.
For optimal browning, use the correct bakeware. Dark, dull pans absorb heat, which results in darker browning. Shiny pans reflect heat, which results in lighter browning.
Baking with your dish uncovered produces a browned or crisp surface, while covering the dish keeps the surface moist and can steam the food. Some recipes start with a covered dish and end by removing the covering to create a crisp finish.
If your baked goods are not cooked or brown on the bottom, try using a lower rack position. Shiny and insulated pans may require additional time and/or need to be closer to the bake element.
Explore KitchenAid® ranges with air-powered cooking
Find convenient oven settings on KitchenAid® ranges, like select modes that use air cooking settings to help create your favorite dishes. Select KitchenAid® ranges offer Air Baking for delicious cakes and muffins, Air Roast to help seal in the flavors and juices of meat and poultry, and Air Broil for when you need to melt, char and sear quickly using intense air-driven heat.

KitchenAid® Hardware Accessory Kits
Curate the colors and textures that move you
From bold Black Ore to the inviting warmth of Bronze, mix and match handles and knobs to refresh your appliances and bring new energy to your kitchen


Your subscription was successful
Thank you for signing up. Keep an eye on your inbox for our next newsletter.
Stay Connected – Join the List
Enjoy articles like this? Get helpful guides and appliance care tips sent straight to your inbox.
