


 New Code Sent!
How to grill in your oven
You don’t need to step outside to create the charbroiled flavor of freshly grilled foods when you know how to grill in your oven. Whether you’re charring vegetables or grilling up some steaks, you can discover the grilling possibilities of your oven when you know the right technique. Use this article as a guide to the general steps of oven grilling.
For grill enthusiasts looking to bring the taste of the barbeque into their kitchen, the KitchenAid® Smart Oven+ with Powered Attachments enables grilling, steaming, cooking on a baking stone and more ways to expand the way you create.

How to grill indoors in an oven
To achieve grilling results in an oven, adjust your racks to be near the oven's heating element, or opt for a broiler pan. Next, raise your oven to 500°F. For further insights on grilling without a traditional grill, or to help master oven grilling, follow these detailed steps.
Supplies
- Cast iron grill pan or broiler pan
Tools
Oven
Tongs
Meat thermometer (optional)
1. Rearrange your oven racks
If you’re using a grill pan, arrange your oven racks close to the oven’s heating element. You can skip this step if you’re grilling using a broiler pan.
2. Place empty grill pan in the oven and preheat
To grill in an oven, you want your cooking surface to be as hot as the oven itself. Place your empty cast iron grill pan inside your oven, then preheat the oven to 500°F. If you’re using the broiler to grill in the oven, place your empty broiler pan on the top rack or in the broiler compartment of your oven. It may take about 20-30 minutes for the oven and pan to come up to temperature.
Tip:
A grill pan is a skillet with raised ridges across the cooking surface, which create the flavorful char marks associated with outdoor grilling. For this cooking method, it is important to use a cast iron grill pan, as it can withstand the high heat from your oven.
3. Grill your food
Once the grill pan has come up to temperature, place your food in the pan and cook like you would on a grill, turning the food halfway through the cooking time. To add even more flavor to your grilled meats or vegetables, brush them with a marinade as they’re grilling to lock in moisture and flavor.
How to grill with the KitchenAid® Smart Oven+
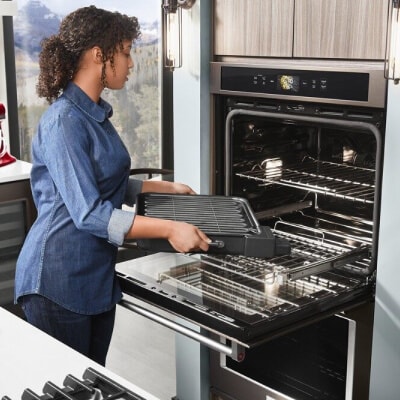
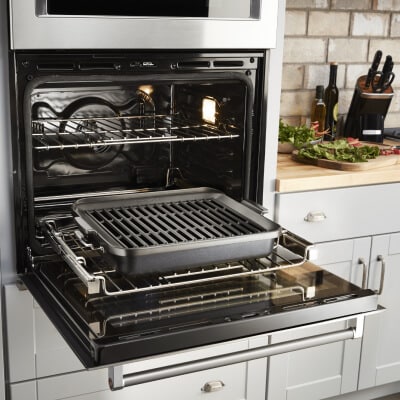
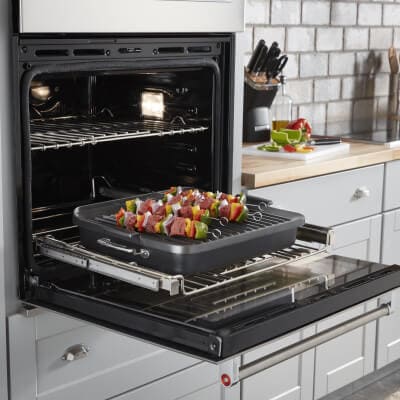
The Grill Attachment connects to a powered hub inside compatible KitchenAid® Smart Oven+ models to activate the grill heating element. Once it’s attached, you can either manually enter the time and temperature you need or select one of the grill settings programmed into the oven.
Once your grill attachment has preheated to the proper temperature, you can either manually control the cooking or select the grilling mode that provides timing suggestions about turning, flipping or removing your food to take the guesswork out of grilling. The heat applied directly to the surface of your food can help give it that signature char and caramelization. The Grill Attachment also minimizes smoke and eliminates flares common with outdoor grills to help make indoor grilling easier.
Shop the latest deals on select KitchenAid major appliances Shop Now

Shop KitchenAid® Smart Oven+ models & attachments
KitchenAid® Smart Oven+ models open up your kitchen to numerous cooking methods, such as grilling without a grill. The KitchenAid® Smart Oven+ attachments turn your oven into a grill, steamer and a baking stone while also performing the traditional oven tasks of baking and broiling.
Is broiling the same as grilling?
When grilling, you cook meats or vegetables over an open flame or hot coals on preheated metal grates using high temperatures. However, when you're broiling, you cook food on a preheated broiler pan positioned inside an oven 2-6 inches beneath the heating element. Both grilling and broiling use intense direct heat to cook your food and provide a similar caramelization.

How do you grill meat in the oven?
You can achieve a similar result to grilling meat outdoors inside your oven. To grill meat in the oven, place your oven rack close to the heating element, allowing for a bit of space in between. The heating element should not touch your food. Preheat your oven to a high temperature (400-500°F) and place your grill pan in the oven as it preheats.
Then, place the meat on a grill pan and grill until the food is cooked to your desired temperature, checking with a meat thermometer. Avoid turning your meat too often as this can reduce the flavor and interrupt the caramelization process that often gives grilled meat a nicely browned crust.
Your KitchenAid® Smart Oven+ Grill Attachment allows you to truly grill in your oven year-round. You can make perfectly charred pork chops or kebabs with settings that suggest when to turn and remove meats from the heat. You can also pan sear and cook steak on your stovetop for delicious caramelized flavor.

How to grill vegetables in the oven
Arrange your oven racks close to your oven heating element, then place an empty grill pan in the oven. Preheat the oven to a high temperature (400-500°F), allowing the grill pan to heat inside the oven. Then, place vegetables on the pan and grill until cooked through.


Oven grill recipes
If you’re ready to start grilling inside your oven, check out the following recipes to get inspired. For more ideas, check out our list of 10 foods you can grill.

1. Thai chicken skewers
This recipe transforms boneless, skinless chicken breasts into tender, juicy and flavorful skewers with flavors like coconut, ginger, lime and thai basil.
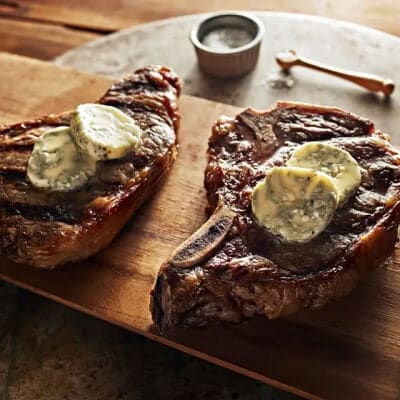
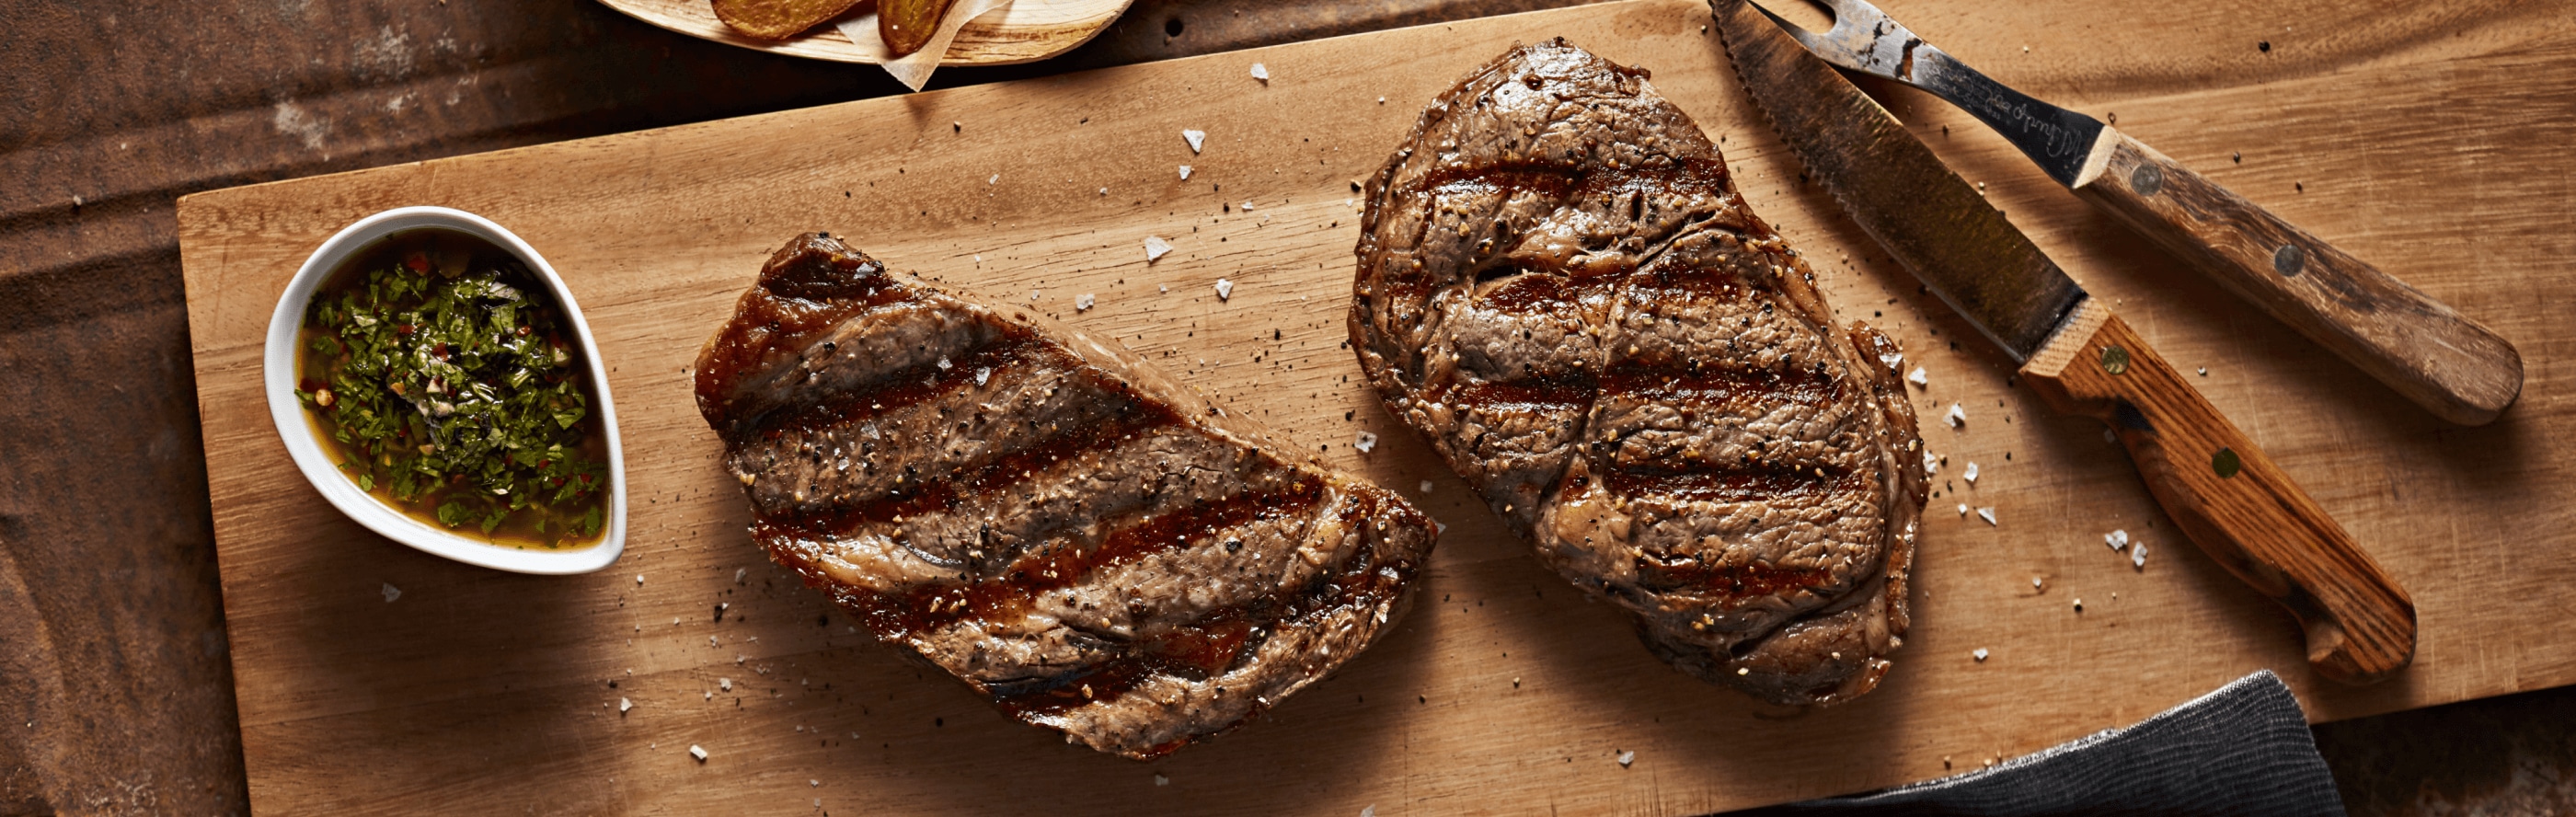
2. T-bone steaks with blue cheese butter
Learn how to grill a juicy and flavorful steak for your next romantic evening at home. This recipe uses aromatic flavors like blue cheese, garlic and freshly chopped herbs to create a rich steak dinner.
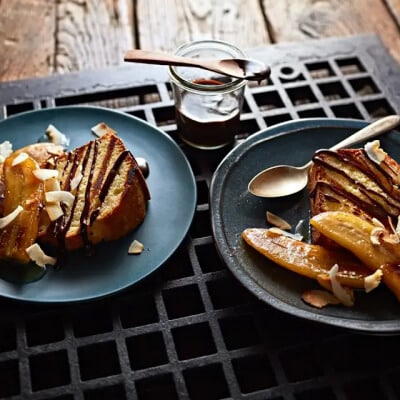
3. Grilled pound cake with caramelized banana
Use up leftover pound cake with this unexpected recipe. Grill sliced pound cake on both sides and top with caramelized banana and shredded coconut to create this sweet treat.
Explore KitchenAid® Smart Oven+ models & attachments
Achieve smarter cooking with the KitchenAid® Smart Oven+. Choose from various models with attachments like the steamer, baking stone and grill to do more with your oven. Or, use the Recipe Guide to get step-by-step cooking instructions tailored for each attachment. Explore the KitchenAid® Smart Oven+ lineup today.


Your subscription was successful
Thank you for signing up. Keep an eye on your inbox for our next newsletter.
Stay Connected – Join the List
Enjoy articles like this? Get helpful guides and appliance care tips sent straight to your inbox.
