
A good shot of espresso yields a rich and complex drink. But the process of making espresso itself doesn’t have to be complex. Learn how to use an espresso machine for cafe-style drinks in your own kitchen, and start experimenting with new flavors and techniques for your best cup.
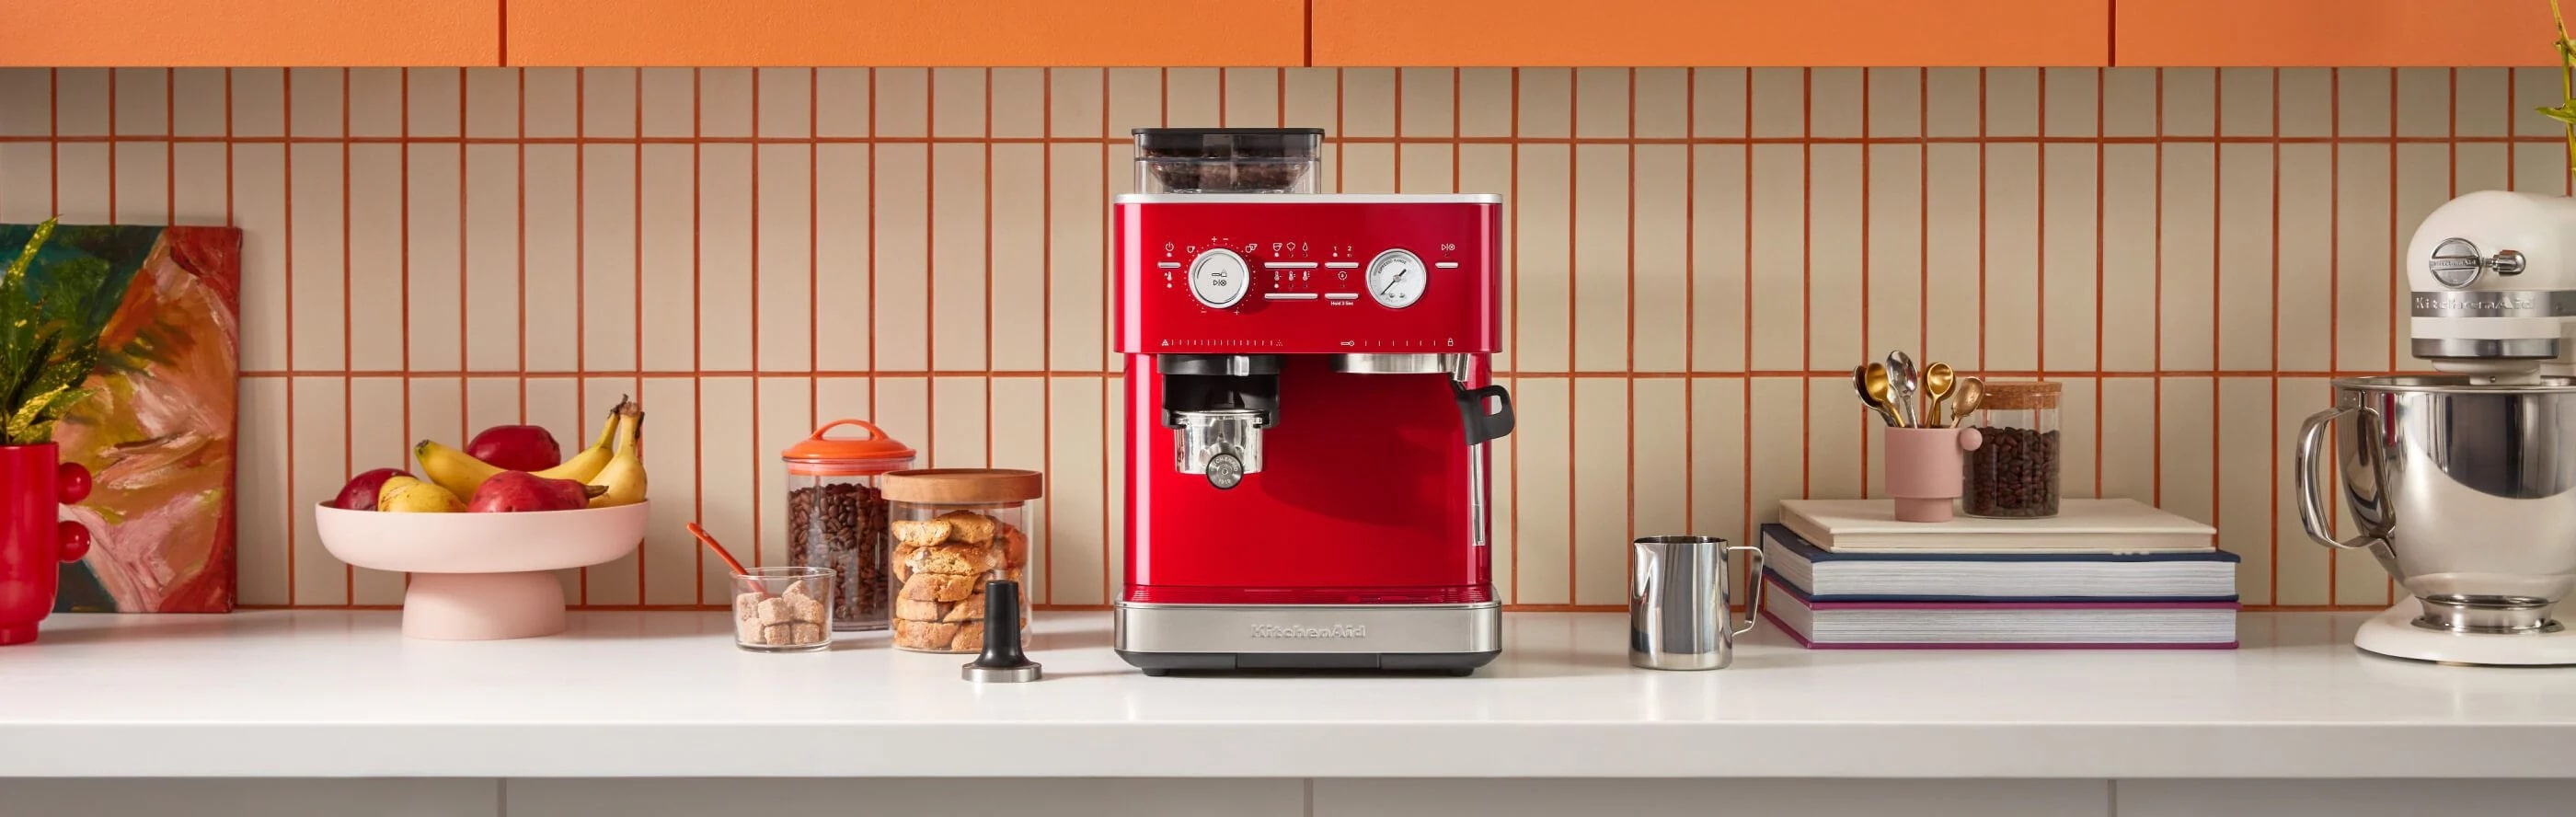
Easily create authentic-tasting espresso drinks right at home with the KitchenAid coffee collection. With products like the KitchenAid Burr Coffee Grinder and KitchenAid Semi-Automatic Espresso Machine, you can make smooth lattes, rich Americanos and tasty cappuccinos from home.
How to use an espresso machine
How to use an espresso machine
What is an espresso machine?
An espresso machine is a coffee brewing appliance that uses high pressure to push a small amount of hot water through tightly packed ground coffee in order to brew 1-2 ounces of a concentrated form of coffee called espresso. This high-pressure process also creates the characteristic crema, a caramel-colored, dense foam on top that lends a creamy texture to espresso.
Common at-home espresso machines fall into two categories: semi- and fully-automatic. Semi-automatic espresso machines are more hands-on, as they require you to grind and tamp your espresso beans in the portafilter before you select your extraction settings. Fully-automatic espresso machines, also known as super-automatic machines, take all of the prep work out of the equation and brew your espresso with the press of a button.
Having an espresso machine at home opens the door to a world of delicious coffee drinks made just the way you like them. Certain types of espresso machines let you play with a number of variables and hone your technique to craft your perfect espresso, whether it’s extra strong ristretto, or a more sippable lungo pull that lets you linger over your cup just a little longer.
What is an espresso machine used for?
At-home espresso machines are used to create shots of espresso that can be enjoyed on their own or as the base of cafe-inspired drinks. If the machine includes a steam wand or milk frother, you can create a wide range of cafe drinks from classic cappuccinos, flat whites and macchiatos, to the ever-popular latte and all its flavor variations.
Some espresso machines even have integrated coffee grinders that grind and dose your coffee beans for you. Espresso can also be used in other recipes like mocha mousse with espresso caviar, espresso martinis or added to marinades and simmer sauces for savory dishes. Take a deep dive into the different types of espresso drinks with this how-to guide.
What coffee do you use for an espresso machine?
Espresso beans are usually just a darker roast of “regular” coffee beans. Sticking with a dark roast will help you achieve the deep flavor you expect with espresso drinks. While you can buy espresso coffee beans, any dark roast such as a French roast will work. However, you will always need to grind your beans to a fine consistency if using them to make espresso. Experiment with different types of roasts until you find a flavor profile you love. When it comes to making espresso at home, it’s all about finding flavors that inspire you to create even more.
How does an espresso machine work?
While there are many types of espresso machines that all work a little differently, there are some basic commonalities. Espresso machines heat water to near boiling and force it through tightly-packed and finely-ground coffee in a portafilter basket to extract a concentrated “shot” of coffee.
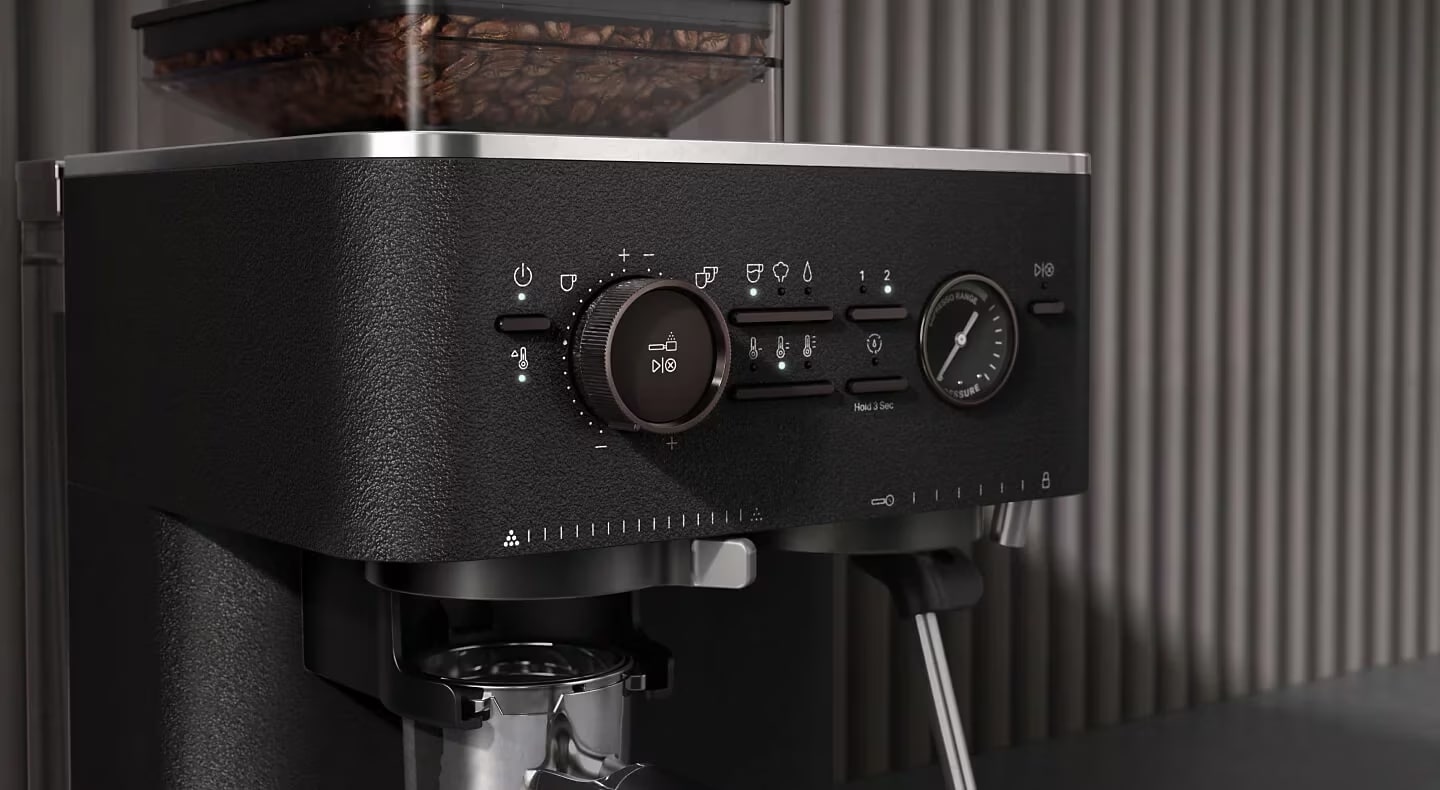
Parts of an espresso machine
Explore some of the main parts of an espresso machine and the role they play in making espresso below.
Portafilter: Holds the coffee grounds during extraction and filters the water through the grounds
Group head: Where the portafilter locks into place for hot water to dispense over the coffee grounds
Boiler: Heats water for brewing and steaming
Pump: Creates pressure and forces water through coffee grounds
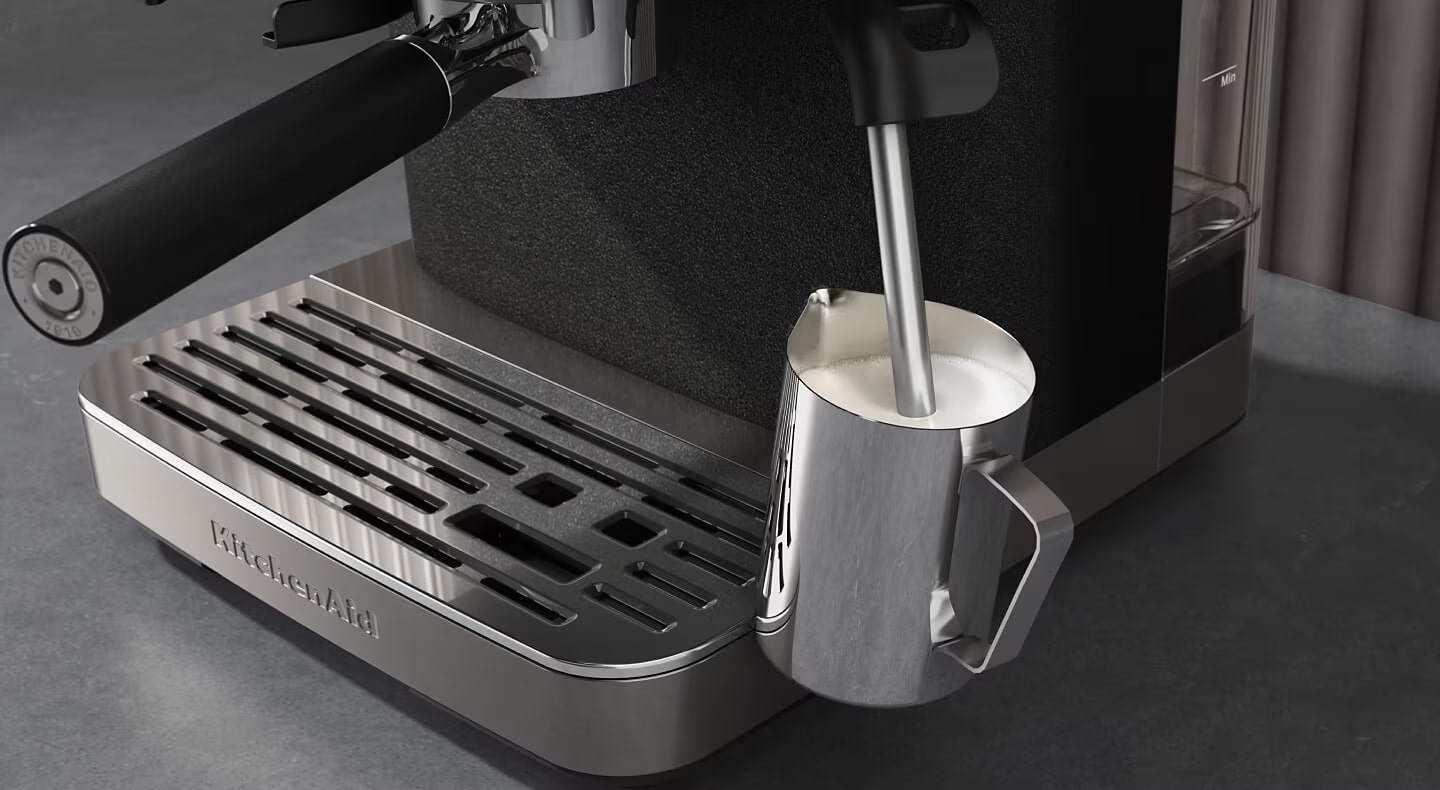
Steam wand: Froths and steams milk
Pressure gauge: Displays brewing pressure
These parts work together when you place the portafilter basket into the portafilter, fill it with ground coffee and tamp to compress the grounds. Then, connect the portafilter to the group head and finally select your brew cycle settings.
How to operate an espresso machine
The process for making espresso varies based on what type of machine you have. A popular type for home use and at coffee shops is a semi-automatic espresso machine. While you’ll always want to refer to your owner’s manual, here are some general steps for making espresso with this type of machine:
Step 1: Preheat the espresso maker
If you’re making espresso at home, your machine likely has a water tank that will need to be filled before getting started. Once you have enough water in the reservoir, switch your machine on. Most models will automatically draw water into the boiler and begin heating it to the right temperature. Let it heat up while you move on to preparing your espresso beans.
Step 2: Grind and measure your coffee
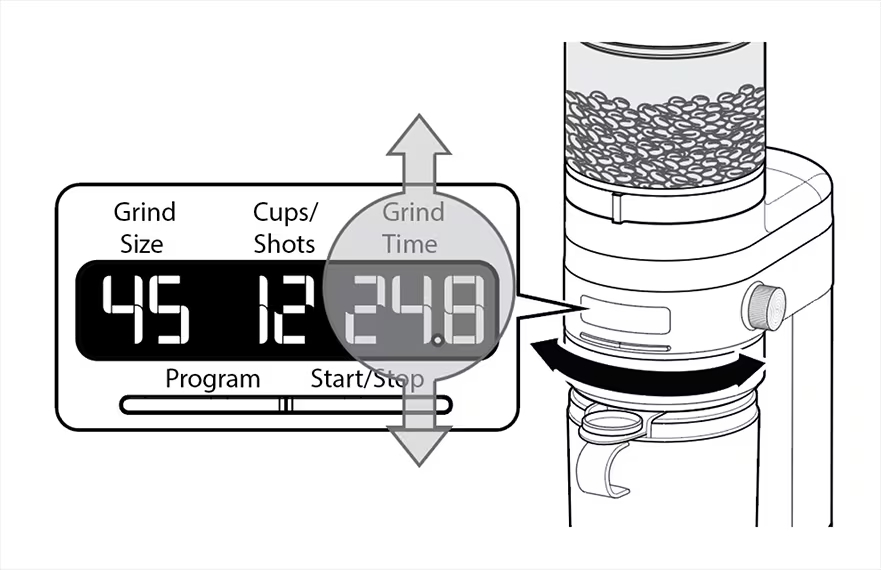
Freshly ground coffee will yield the best results. Remember to finely grind your coffee beans so the resulting texture is similar to somewhere between sand and powder. A burr coffee grinder can help produce more uniformly sized grounds for even extraction. Some models have a specific espresso setting to take the guesswork out of the grinding process. Learn more about types of grinders to find the best one for you.
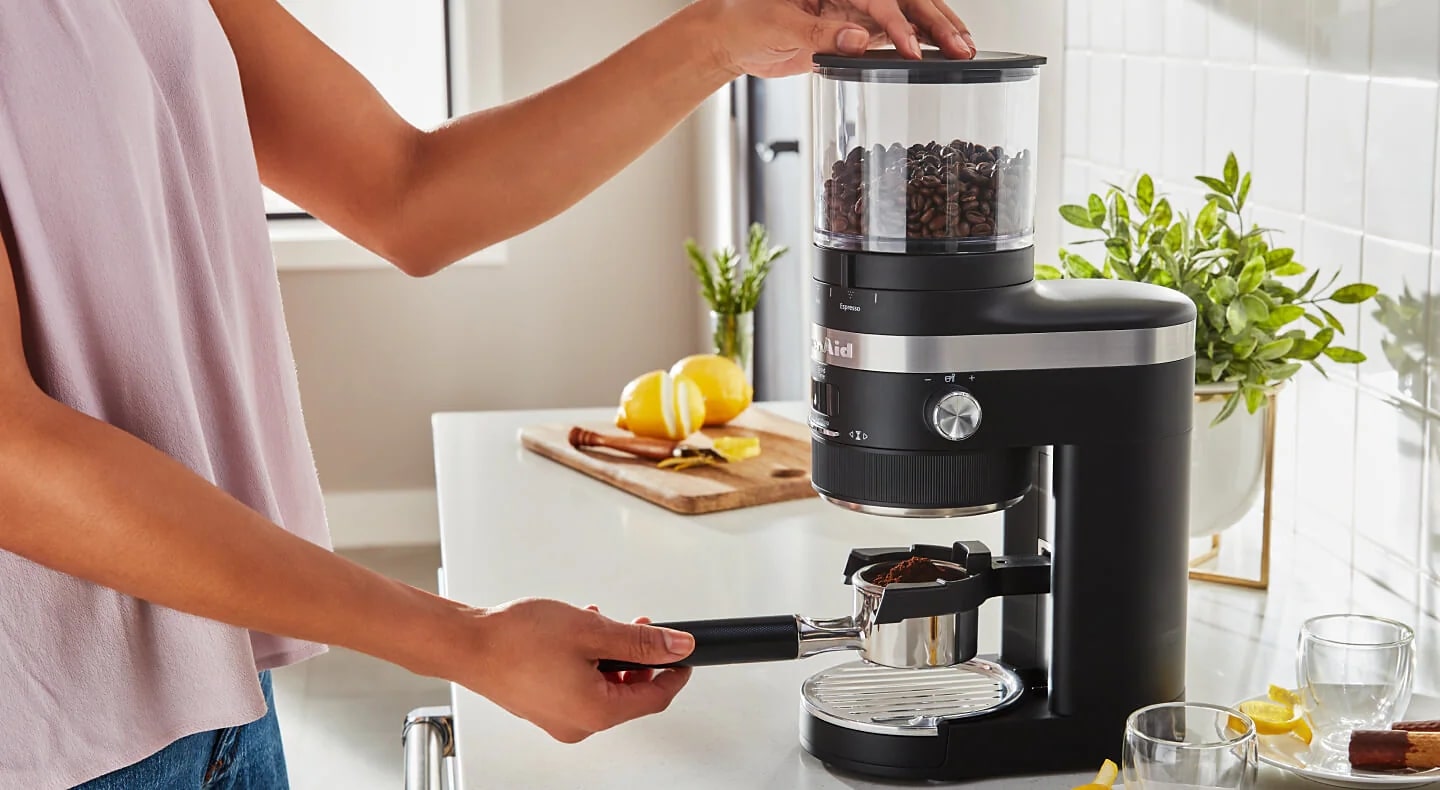
The KitchenAid® Burr Grinder features 70 precise settings and Automatic Smart Dosing Technology that automatically adjusts grind time to deliver the proper volume and consistency for your selection. It also features a Built-In Adjustable Portafilter Holder so you can grind directly into 54-mm or 58-mm portafilters depending on the size and number of shots you’re brewing.
Step 3: Select your filter basket and add grounds
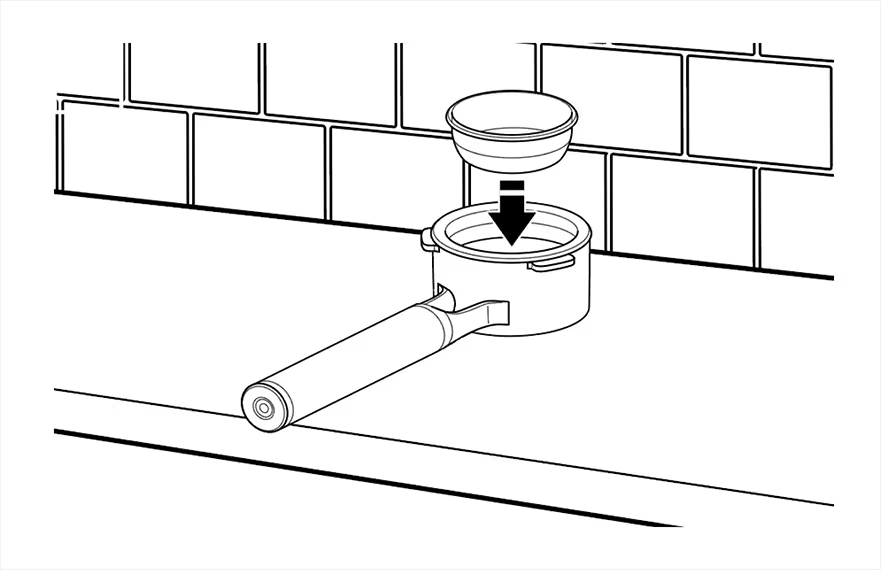
Select your desired filter basket depending on how much espresso you’ll make. Press the Filter basket into the portafilter until it clicks into place. Add finely ground coffee to the filter basket. While exact dosage will depend on your espresso machine design and the size of your filter basket, this quick reference chart can give you a good idea:
Basket type | Shot | Dose (gram) | Use for |
|---|---|---|---|
Single wall | 1 shot | 10 - 12 | Freshly ground whole bean coffee |
Single wall | 2 shot | 18 - 20 | Freshly ground whole bean coffee |
Double wall | 1 shot | 10 - 12 | Pre-ground coffee |
Double wall | 2 shot | 18 - 20 | Pre-ground coffee |
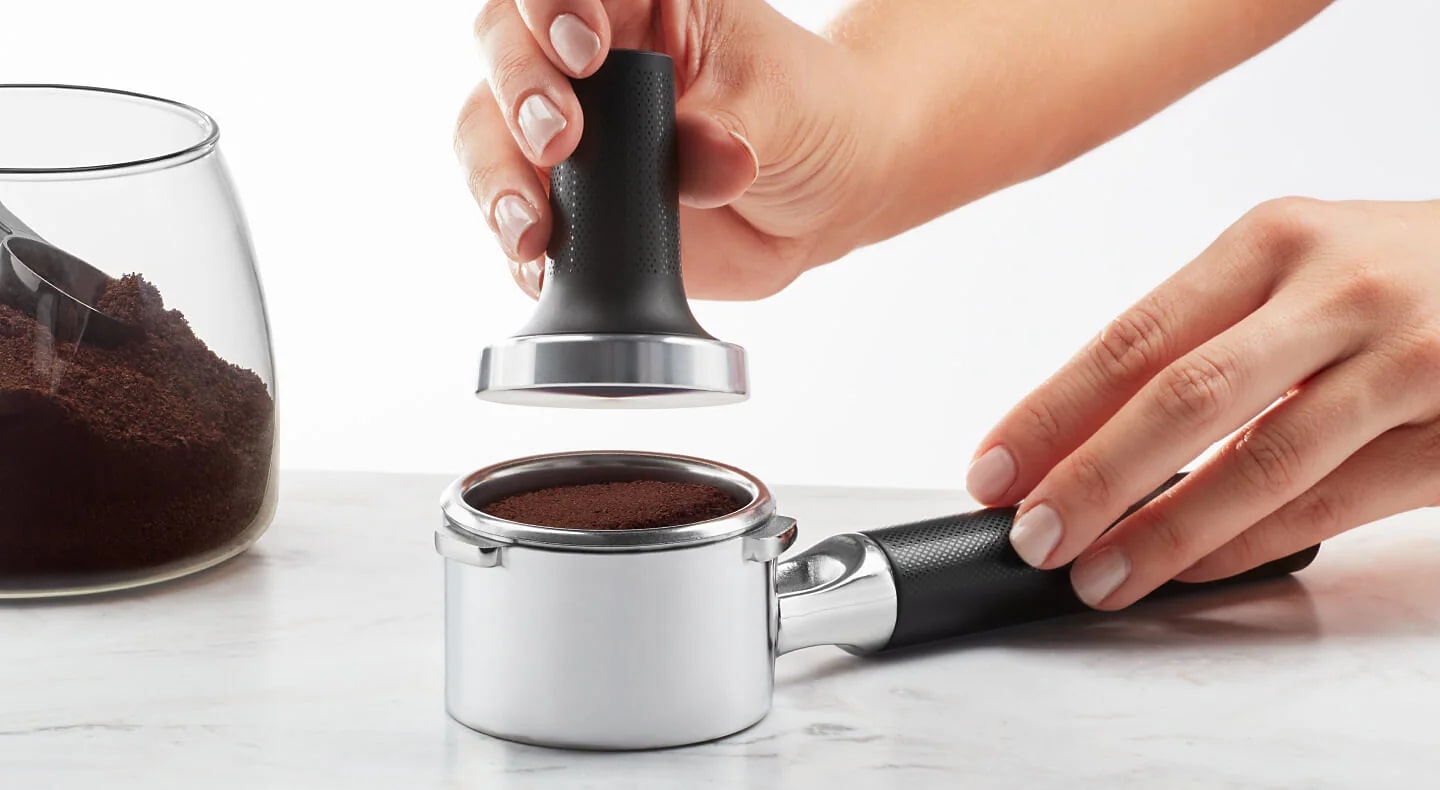
Step 4: Tamp the espresso grounds
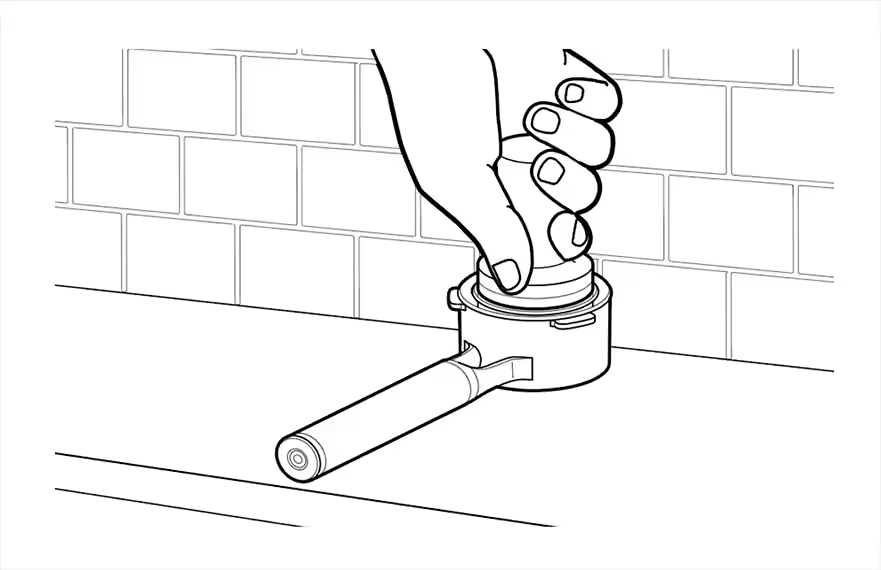
Tap the portafilter to level the ground coffee bed and rest on a flat surface. Use a tamper to press down on the grounds within the portafilter basket. Make sure to press firmly and evenly to create a level puck of compressed grounds. Sweep excess coffee grounds from the rim. Having a level, consistently compressed bed of coffee grounds (known as a puck), is important in ensuring even extraction.
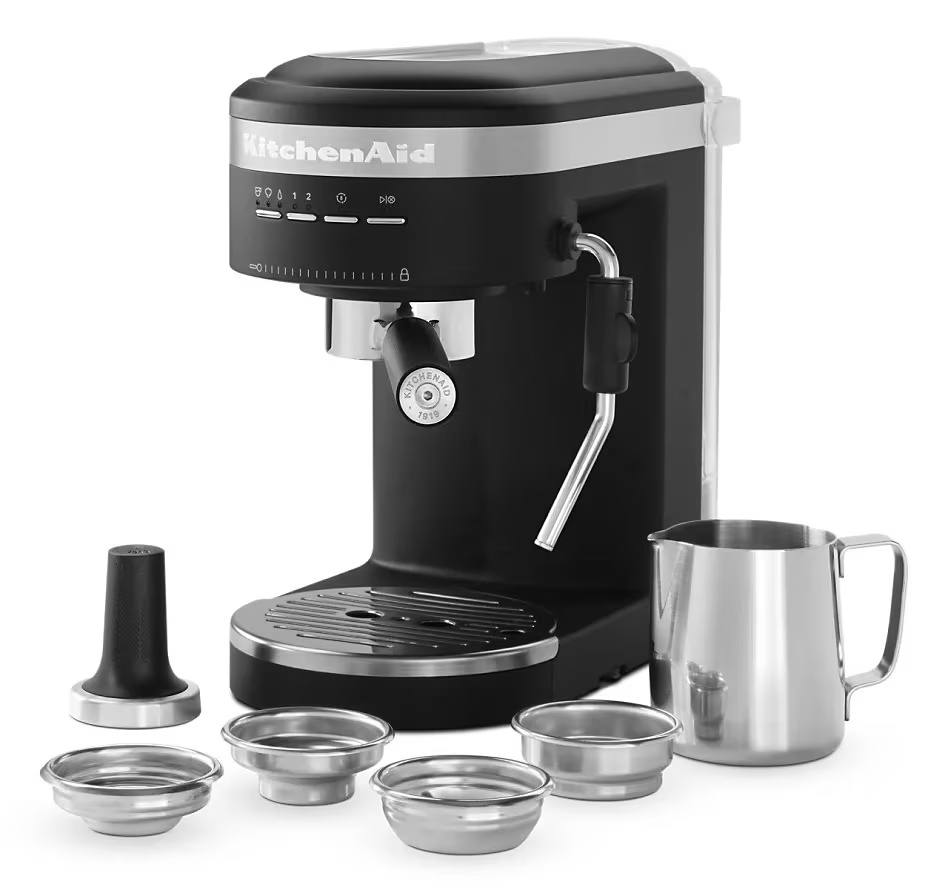
If the coffee bed is uneven, it can cause the water to channel, over-extracting the grounds in contact with the water while leaving the rest under-extracted. The spouts on many portafilters stick out from the bottom, which can make it challenging to level the puck. The KitchenAid® Semi-Automatic Espresso Machine features a portafilter designed with two recessed spouts to enable a flat base for easier, more stable tamping vs. traditional residential espresso portafilters.
Step 5: Lock in the portafilter
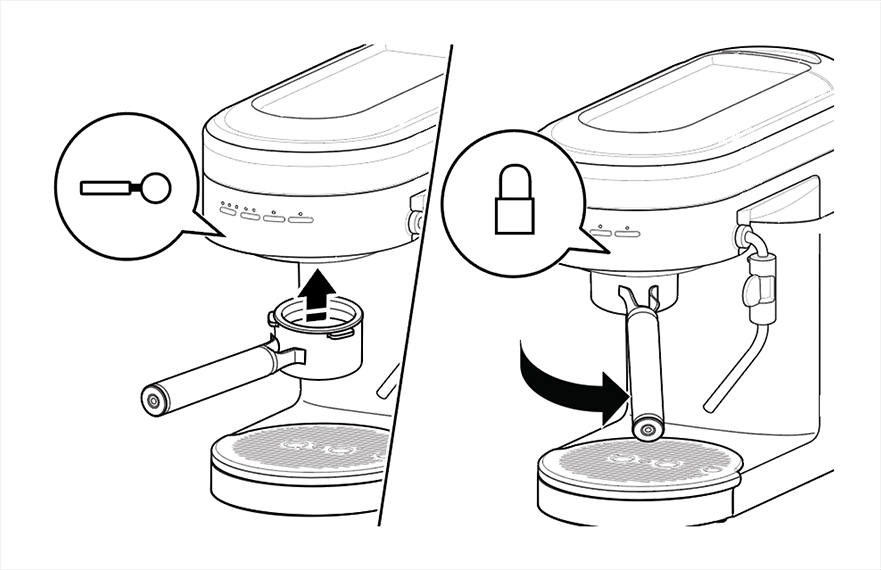
Position the portafilter under the group head, then raise it into the group head and twist to lock. The exact process will depend on your model. KitchenAid® espresso machines feature clear unlocked and locked icons to help you line it up correctly. It’s important that the portafilter is locked into place as this helps create a seal crucial to the high-pressure extraction process.
Step 6: Pull a shot
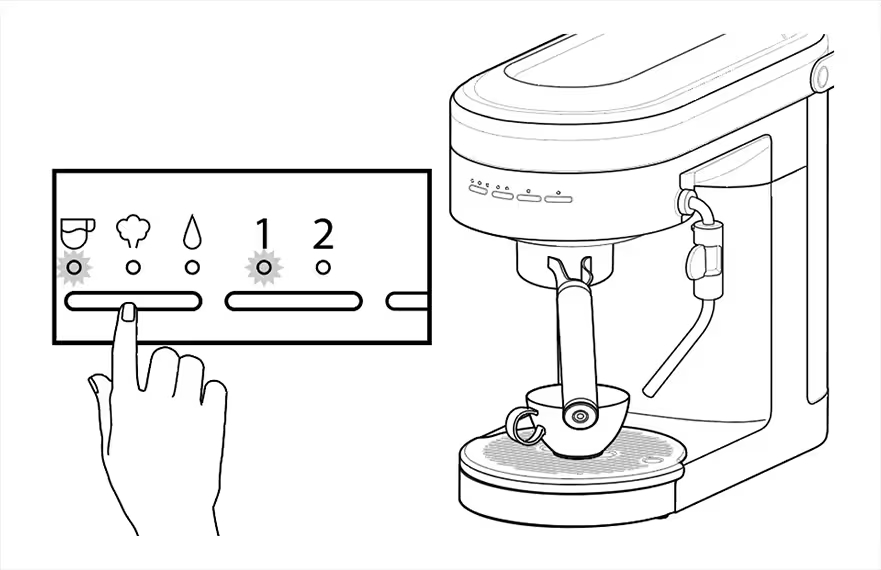
Most semi-automatic espresso machines automate this part of the process and you can simply select the number of shots and sit back while the machine brews your espresso. Some models require you to control the amount of water and the pre-infusion time. Others automate this, but let you adjust the settings ahead of time to your preference.
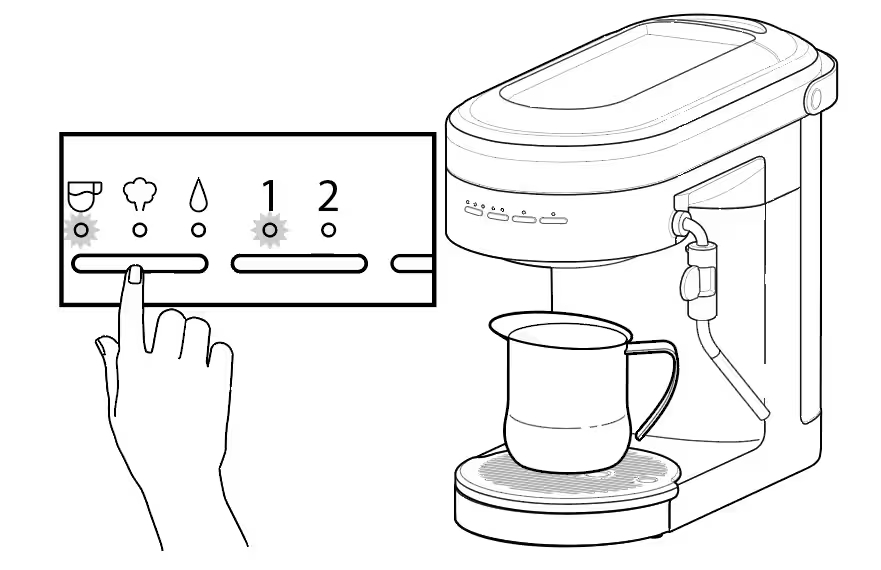
Step 7: Steam the milk
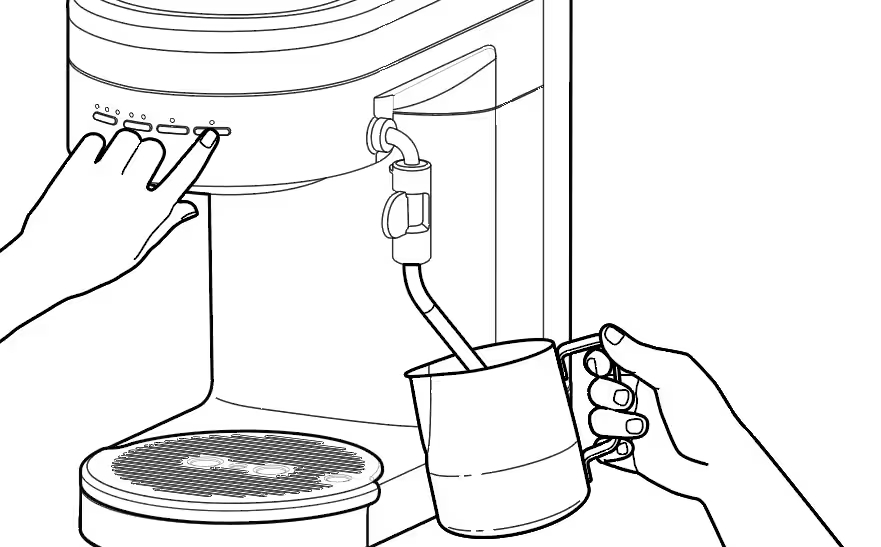
If making a coffee drink with steamed or frothed milk, fill your pitcher with milk, select the steam mode (if applicable) and steam until the desired amount of foam or milk temperature is reached.
Step 8: Dial in the espresso
Depending on your espresso machine, you may be able to adjust a number of factors to brew your perfect shot. “Dialing in” is the process of adjusting grind size and amount, length of extraction and other factors to your taste. A manual espresso machine allows you to adjust nearly every factor but requires some experience and skill. A semi-automatic espresso machine allows you to control the amount of coffee, size of the grind, tamping and more to create a customized flavor profile to your liking. An automatic or super-automatic espresso machine will offer little opportunity to dial in your espresso but often produces consistent results, pour after pour.
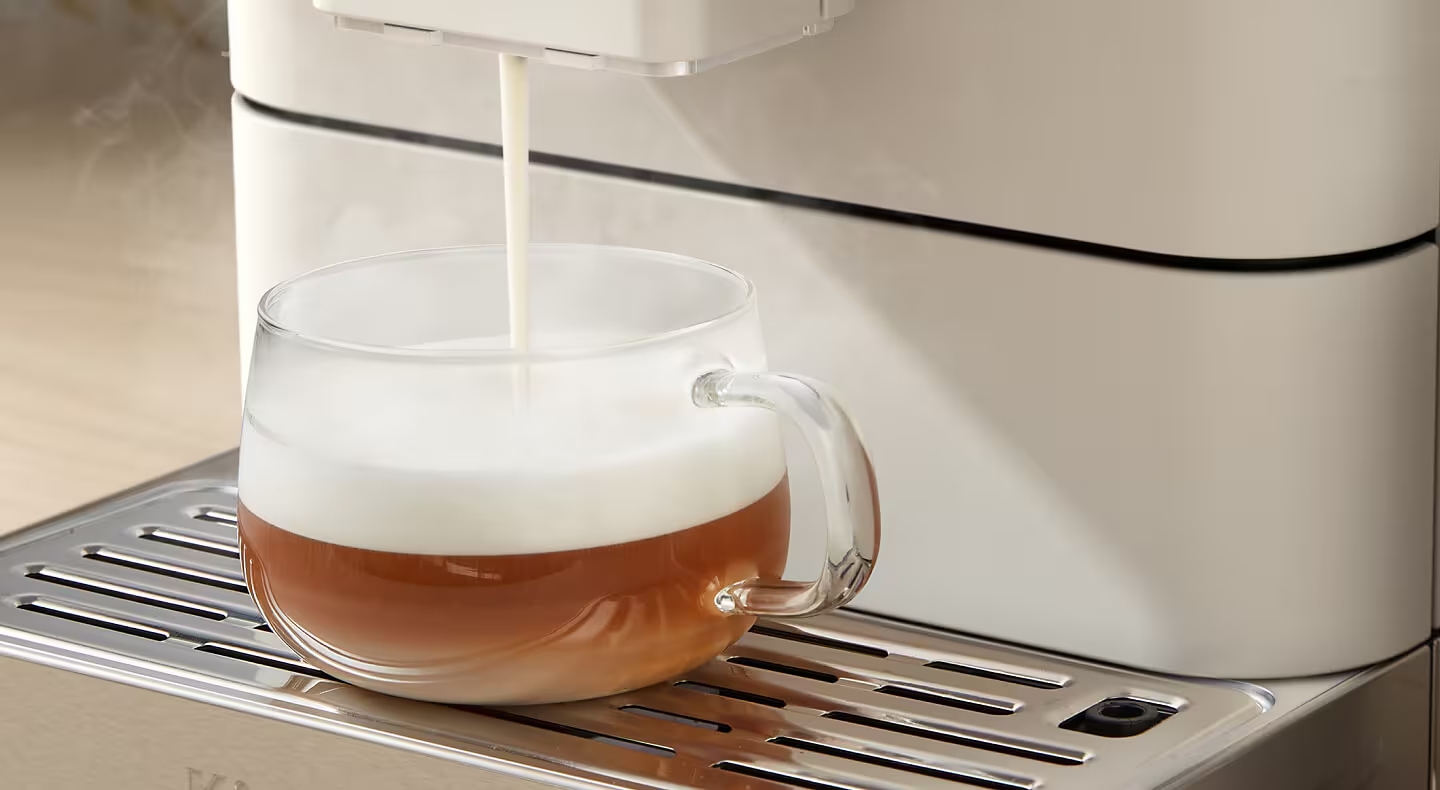
How to steam milk with an espresso machine
Espresso is the base for most coffee shop favorites like lattes, cappuccinos and mochas. Adding steamed milk and foam is what transforms a robust shot of coffee into a creamy indulgence with a nearly endless number of variations.
Steaming and frothing milk for a range of beverages is an art in and of itself. Learn about different types of milk frothers and how to use them with this guide, or check out these tips below.
Step 1: Add milk to your pitcher
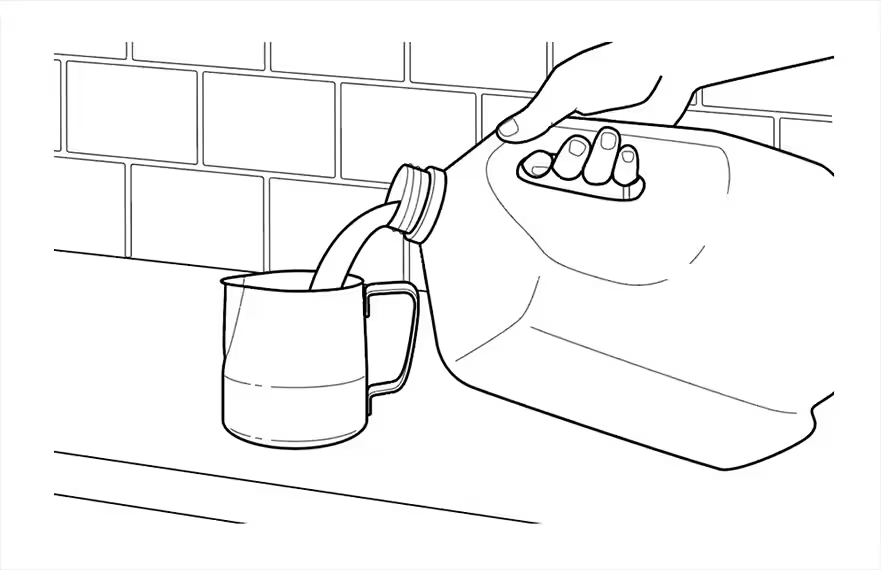
Fill a pitcher about ⅓ full with milk. Always start with cold milk straight from the refrigerator for the best results.
Step 2: Insert the steam wand
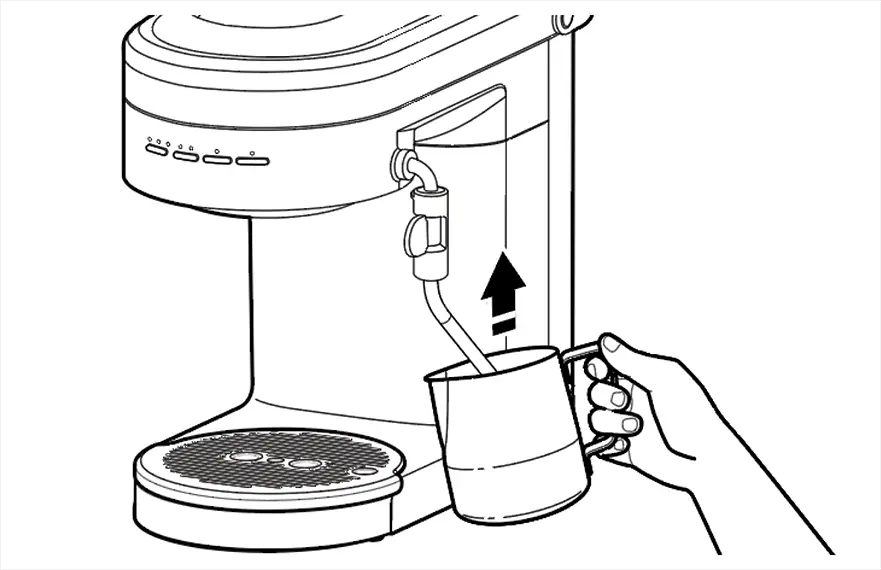
Select the steam mode on your semi-automatic espresso machine to begin heating the water. Once it’s ready, submerge the tip of the steam wand into the milk to steam, or just below the surface to create foam.
Step 3: Create desired amount

Froth until desired level of foam and temperature is reached, then add the correct ratios of steamed milk and foam to your espresso along with any other flavorings.
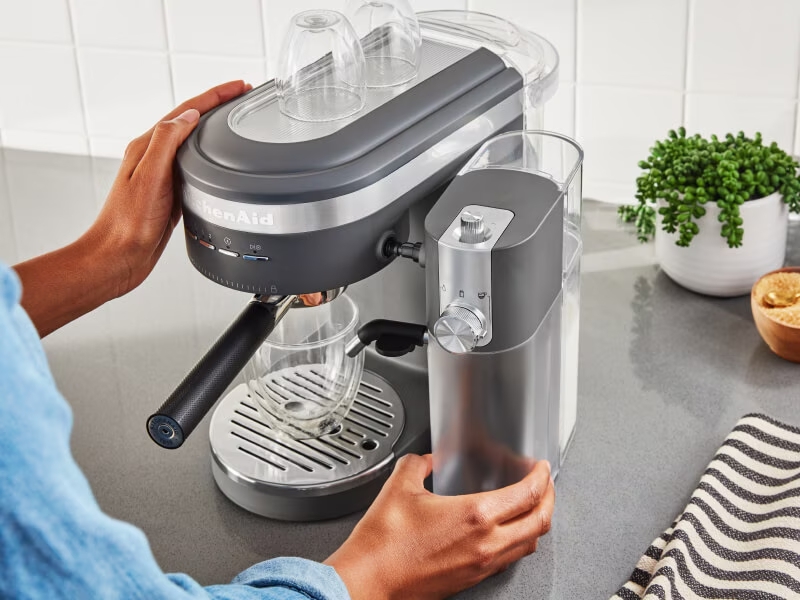
Some espresso machines automate this process as well to help eliminate guesswork. The KitchenAid Automatic Milk Frother Attachment is compatible with the KitchenAid Semi-Automatic Espresso Machine and effortlessly steams and froths milk for delicious lattes, cappuccinos and more. The programmable dosing and a variable micro-foam adjuster allow you to adjust the milk amount and texture to match your taste and preference.
How to operate a fully-automatic espresso machine
Using a fully-automatic espresso machine is simple. Just fill the water tank and bean hopper and select the appropriate setting on your machine’s control screen and you’re on your way to enjoying rich and flavorful espresso in less than 60 seconds.
Use the following instructions along with your product manual to learn more about operating a fully-automatic espresso machine.
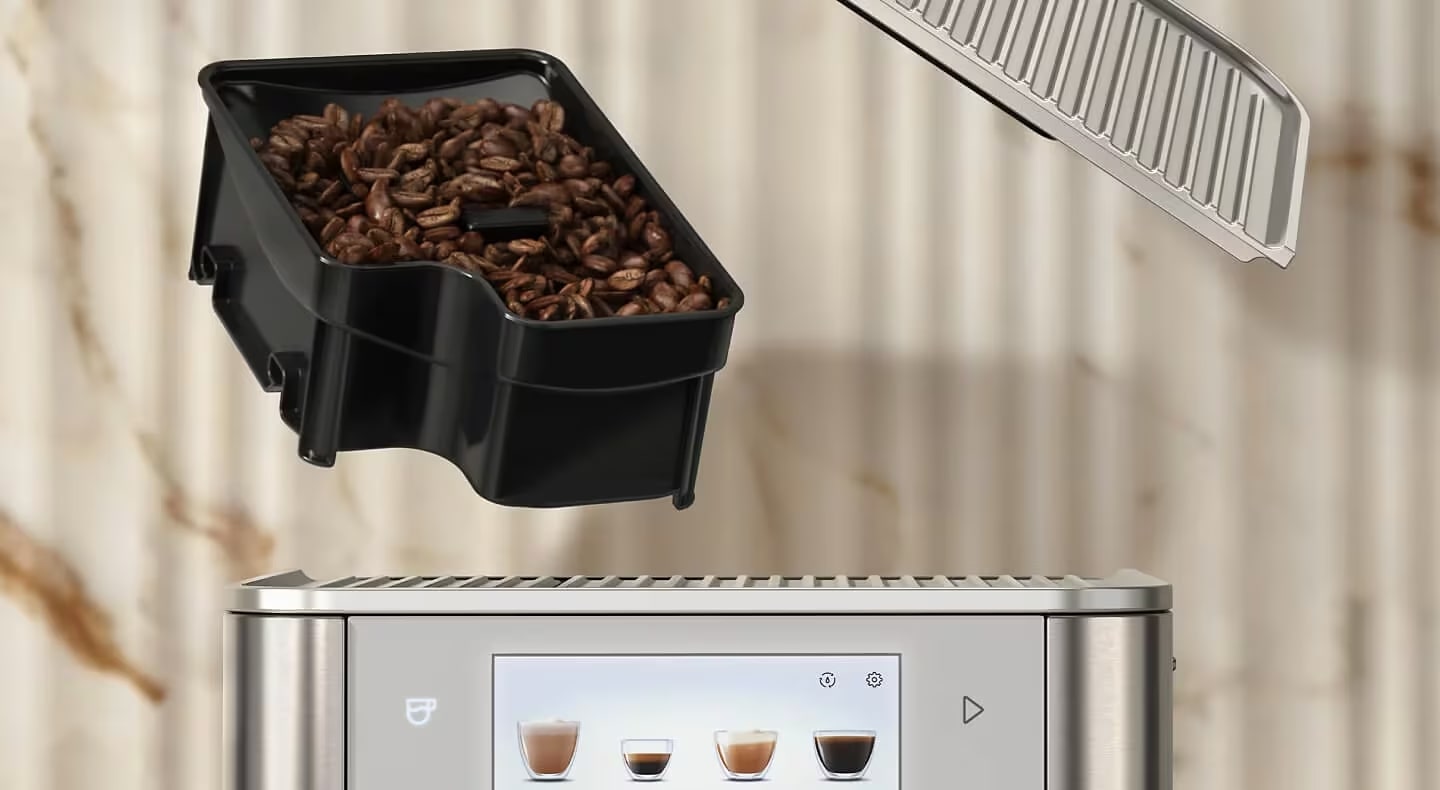
Step 1: Fill the water tank and bean hopper
Before you begin brewing, fill your espresso machine’s water tank with tap water and pour your coffee beans into the bean hopper. If you’re making a milk-based espresso drink, add milk to the machine’s milk container.
Step 2: Select a setting on the control screen
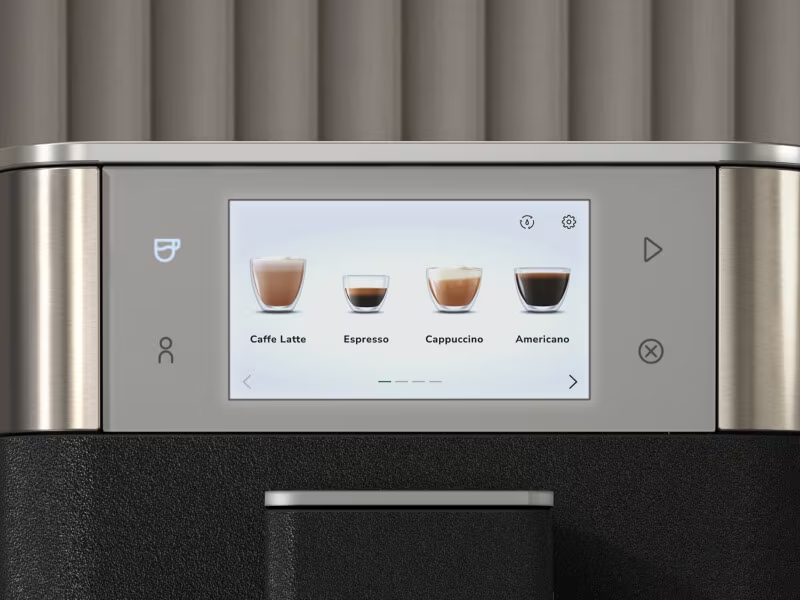
Select your chosen espresso beverage on the machine’s control screen, then press Start. Refer to your product manual for model-specific beverage settings.
Step 3: Enjoy your espresso

Fully-automatic espresso machines do all the work of brewing your favorite espresso drinks for you, leaving you with time to make special toppings for your beverage, like homemade whipped cream, fresh caramel sauce or even ice cream, so you can enjoy a luxurious affogato in the comfort of your kitchen.