


 New Code Sent!

How to use a pizza stone in the oven
If you’re looking forward to creating an authentic, oven-baked pizza recipe at home, a popular kitchen tool is a pizza stone or baking stone. Learning how to make pizza on a pizza stone can help make eating pizza at home a memorable event.
Explore how to use and care for a pizza stone, plus different ways to use your pizza stone beyond making pizza. If you’re excited to learn how to use a pizza stone or baking stone, follow the steps below to get started.


What is a pizza stone?
A pizza stone is a flat stone or ceramic cooking surface that mimics the cooking style of a brick oven floor. As the oven gets hotter, so does the pizza stone, passing the heat along to the bottom of the pizza crust to create crispy, restaurant-style pizzas right in your oven.


Baking stone vs. pizza stone: What's the difference?
A baking stone is an oven accessory that allows you to cook restaurant-style pizzas with crispy crusts at home. The KitchenAid® Smart Oven+ Baking Stone Attachment is a glazed ceramic surface that works with your oven to provide even heat for baking pizzas, breads, pastries and more. With its large size and ability to quickly preheat, a baking stone can help expand your recipe repertoire and hone your cooking techniques.
A pizza stone is a type of baking stone. The main difference between baking and pizza stones comes in material and shape—pizza stones tend to be circular and made from a porous material while baking stones are often rectangular in shape and have a smooth, glazed, ceramic non-stick surface. While all pizza stones are baking stones, not all baking stones can be considered pizza stones. You can most certainly use a baking stone to create a pizza, and you can also use a traditional circular pizza stone for baking pita bread, quesadillas, crackers, English muffins and more.


How to bake pizza with a pizza stone
Understanding how to cook pizza on a pizza stone is the first step to making crispy, authentic pizza at home. You’ll want to start by preheating the oven with the pizza stone inside, so it can slowly preheat as well. As your oven and pizza stone preheat, prepare your pizza. Once your pizza is prepared and your oven and pizza stone are preheated, carefully transfer the pizza to the stone and bake to your preferred temperature. Keep reading for step-by-step instructions on how to cook a pizza on a pizza stone.
What you'll need
A pizza stone—either a traditional stand-alone stone or an oven‑compatible stone attachment, like these options from KitchenAid brand
Pizza dough with toppings ready to be baked
Pizza peel, to assist with placing pizza on top of baking stone
If you don’t have a pizza peel, use a rimless cookie sheet and parchment paper to transfer dough onto pizza stone
Cornmeal or flour
Oven mitts
Pizza cutter
Step 1: Put pizza stone in oven and preheat
Place the pizza baking stone into a cold oven and then preheat the oven to 500°F, or whichever temperature your recipe requires. The pizza stone will heat up as the oven preheats.
You should never place a cold pizza stone into a hot oven, as this may cause your stone to crack or pop apart. Make sure to keep your pizza stone in the oven for 30 minutes to an hour before baking your pizza to ensure that the stone reaches its ideal temperature. While infrared thermometers are not necessary, they may be helpful in determining if your pizza stone is hot enough.
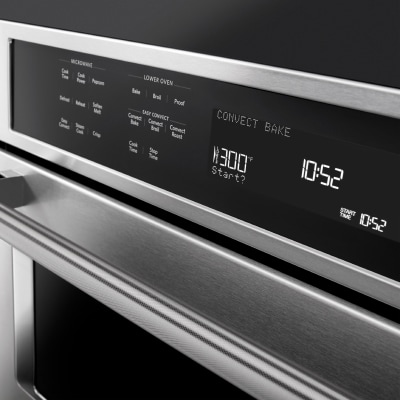
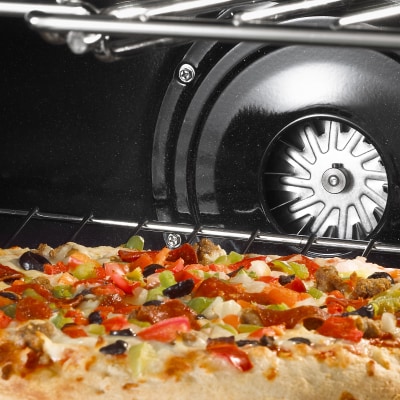
If using a KitchenAid® Smart Oven+ with the Baking Stone Attachment, start by inserting the roll-out rack into the lowest rack position and place the base pan and heating element on the roll-out rack. Then, push the base pan in to lock into place.
Put the baking stone on the heating element and push the roll-out rack fully into the oven. You’ll hear a tone and see an icon pop up on the display. Consult the user manual for more details.
Step 2: Prepare your pizza
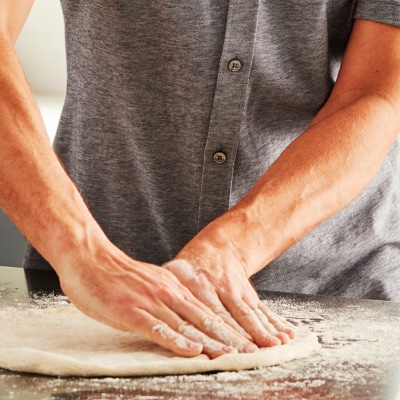
Dust your pizza peel or rimless baking sheet with cornmeal or semolina flour to help keep your pizza from sticking. If using the KitchenAid® Smart Oven+ Baking Stone Attachment, roll out your dough on parchment paper cut to fit the baking stone surface. The parchment paper will prevent food from sticking to the attachment and will allow for easy cleanup.
If using the KitchenAid® 13” Round Range Oven Pizza Baking Stone, your pizza is not likely to stick during baking because, unlike a metal sheet pan, the porous surface of a pizza stone allows for steam to evaporate more efficiently and helps to create a crispy crust.
Roll out and stretch the dough directly onto your pizza peel or rimless baking sheet, then add your sauce, cheese and toppings.

Step 3: Place pizza on stone
Once the oven and the baking or pizza stone are fully heated, open the oven door and use your oven mitts to slide out the rack holding the pizza stone. Then, carefully use a pizza peel (or a rimless cookie sheet with parchment paper) to transfer the dough directly onto the pizza stone. Close the oven door quickly to help preserve the oven’s temperature.
Step 4: Bake
Refer to your recipe’s instructions for bake time. At a high heat of 500°F, the pizza should only take about 10-12 minutes to bake, but this depends on a lot of factors, so keep an eye on your pie as it cooks. A good rule of thumb for using a pizza stone is to bake your pizza until the cheese on top begins to bubble and the crust becomes golden brown.

Step 5: Remove the pizza and slice
Once your pizza is done, open the oven door and use your pizza peel to remove the pizza from the oven. Slide the peel underneath the pizza in a quick, smooth motion and gently pull the pizza out.
After your pizza cools, you can cut it into traditional triangle slices or into tavern-style squares. Tavern-style squares can offer the same amount of pizza in smaller slices, making it a popular choice for larger crowds.

Step 6: Cool, brush and store the stone
Allow your oven and pizza or baking stone to cool fully. Then, brush off any crumbs or food bits as necessary with a bench scraper or stiff brush. Avoid rinsing a hot pizza stone in cool water to prevent thermal shock that could cause it to crack. However, once it’s cool, if you can’t get it clean, you can introduce a very small amount of water—just enough to get it damp—and then scrub at it with a stiff brush yet again to help get it clean.
Unlike a porous pizza stone, the KitchenAid® 13” Round Range Oven Pizza Baking Stone can be washed with soap and water.
Shop KitchenAid® wall ovens with the Baking Stone Attachment
Create homemade pizza on a pizza stone from the comfort of your kitchen with Fresh Pizza Mode on select KitchenAid® wall ovens. This setting cranks the heat to 550°F for delicious results so you can create homemade, restaurant-style pizzas from the comfort of your kitchen.
How to take care of a pizza or baking stone
Caring for a pizza stone usually only requires brushing off the surface of dried crumbs or food particles after baking. Wait until your oven and pizza stone have completely cooled, then carefully take the pizza stone out of the oven. The pizza stone is heavy, so be careful lifting it and brushing off excess food particles over your sink. You can also use a spatula, bench scraper or nylon brush to help remove stubborn cheese.
For more difficult stuck-on foods, use a combination of equal parts baking soda and water. Let your mixture sit briefly, then scrub the paste away with a brush before wiping your stone and letting it air dry.
Keep in mind that over time your pizza stone will likely develop some blotches of discoloration—this is generally a result of normal usage and you don’t need to worry about it.
To best care for the KitchenAid® Smart Oven+ Baking Stone Attachment, let it cool before cleaning. You can hand wash it with soap, water and a soft cloth or sponge. Use baking soda to clean up stubborn messes and a scraper to remove baked-on foods.


Discover how to bake with a pizza stone & baking stone
The best way to use a pizza stone or baking stone is to experiment with recipes that feature crispy, baked crusts and savory or sweet flavors. You can use the Baking Stone Attachment on select KitchenAid® Smart Ovens+ in place of a traditional baking pan or loaf pan to create baked goods with crispy crusts, or the delicious recipes listed below.
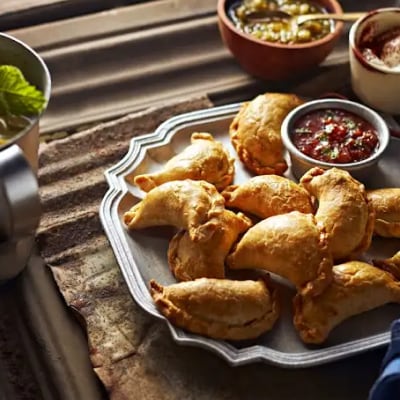
Empanadas
With crisp exteriors and a spicy, beef filling, these empanadas are an ideal recipe for a pizza stone or baking stone.
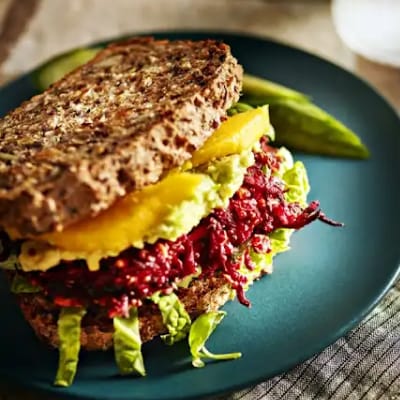
Beet burgers
If you’re in search of a delicious vegetarian alternative to the traditional hamburger patty, try baking these beet burgers.
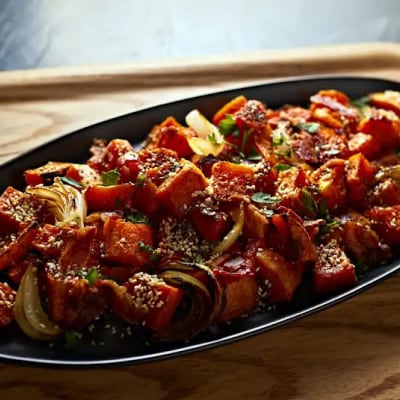
Sesame and chia roasted butternut squash
With only nine ingredients, this sesame and chia roasted butternut squash recipe is ideal as an appetizer or main dish, and can be made with the Smart Oven+ Baking Stone Attachment.
Discover more uses for your baking stone and get recipe inspiration to take your meals to the next level.

KitchenAid® smart wall ovens
Experience cooking through a new lens
Select KitchenAid® smart wall ovens monitor the entire cooking process for you with features like Live Look-In and the Intelligent Cooking Camera with Doneness Detection
Pizza stone FAQs
Now that you’ve learned more about how to use a pizza stone in the oven, keep reading for answers to common questions on pizza stones.
Do you have to season a pizza stone?
It is not necessary to season a pizza stone. The purpose of a pizza stone is to provide an evenly heated, flat, porous surface that creates an ideal baking environment for crispy crusts of any kind, from pizzas and breads to pastries and tortillas. Because it’s a different process for cooking food than sautéing on a cast iron skillet, you don’t need to add oil to your pizza stone.
What temperature should a pizza stone be?
You should typically preheat your oven to 500°F and allow for your pizza stone to preheat in your oven to avoid thermal shock.
How long should you preheat a pizza stone?
Pizza stones should be preheated for at least 30 minutes to an hour. Make sure to place your pizza stone into the oven as you preheat, to ensure that the stone and the oven preheat simultaneously.
Can you use a pizza stone on the grill?
Because of its ceramic material and ability to withstand high heat, pizza stones can work great on a grill. The process is similar to using a pizza stone in the oven.
Start your grill as you normally would, aiming for a temperature of 400°F or more. Once your grill is hot, place the stone on your grill and preheat for about 15 minutes with the lid closed. Then, add your pizza to the stone, close the lid and cook until the cheese is gooey and the crust is golden.
Can you cut pizza on a pizza stone?
Generally, you should move the pizza to a cutting board or similar surface to slice it. Since you should avoid placing a hot pizza stone on your countertops, it may be a good idea to avoid cutting pizza on a pizza stone.
What is the difference between a pizza stone and a pizza steel?
Pizza steels require less preheat time compared with pizza stones; however, pizza stones can retain heat well and distribute it evenly. Stones are much better at releasing heat gradually, while steels often cook faster and tend to produce a crisper crust. Both pizza stones and steels are relatively low maintenance.
Explore KitchenAid® ovens and attachments for more baking possibilities
Select ovens and ranges from KitchenAid brand, like this Smart Oven+ 30" Single Oven with Powered Attachments, can help you expand your culinary skills to grill, bake and steam with one appliance. The KitchenAid® Pizza Baking Stone helps you achieve restaurant-style crispy pizza crusts with your standard or convection oven and can also be used for breads, bagels, rolls, cookies, pastries, and much more.
