


You can make homemade ice cream in a blender with a creamy base, sweetener and your favorite flavor ingredients before freezing the mixture into a scoopable dessert. A blender helps bring the ingredients together quickly, making it a simple way to create a frozen dessert with flavors, toppings and mix-ins you choose.
Whether you’re scooping it into a bowl, layering it into sundaes or experimenting with dairy-free options, blender ice cream gives you a flexible starting point. Keep reading for a blender ice cream recipe, ingredient tips, texture guidance, dietary variations and other ways to make homemade ice cream.
How to make ice cream in a blender
How to make ice cream in a blender
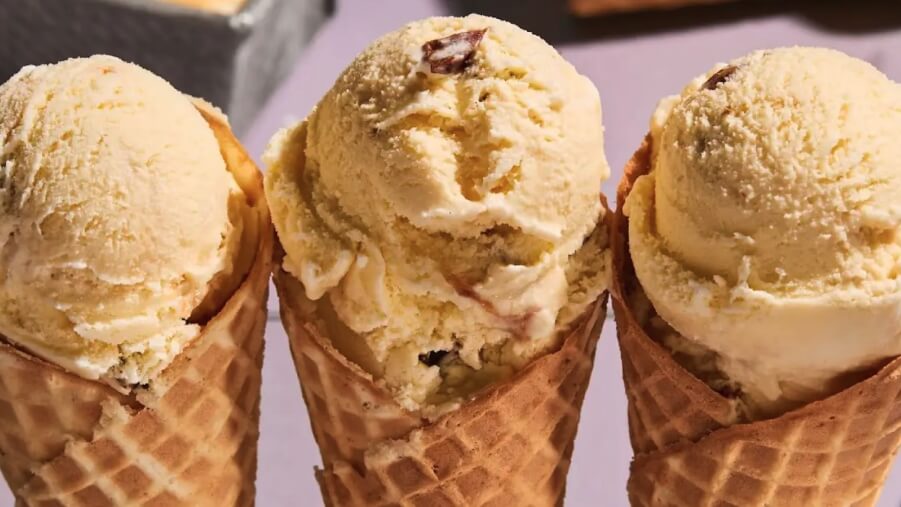
How do you make ice cream with a blender?
There are several ways to make ice cream at home using a blender. You can go traditional by building a base with ingredients like whole milk, condensed milk or heavy cream for a rich flavor profile, or you can opt for dairy-free options that use almond milk, oat milk or coconut milk to create a creamy consistency without dairy.
Whether you’re a fan of tropical fruits, a classic vanilla lover or a chocoholic, you can easily whip together your creation using a blender.

Blender ice cream recipe
This blender ice cream recipe starts with a simple vanilla base you can customize with chocolate, peanut butter, fruit, cheesecake or cookie pieces, nuts, ribbons of caramel or other favorite mix-ins.
You can also adjust the recipe to match your preferences by choosing a liquid base with enough fat to add body, such as heavy cream, whole milk, full-fat coconut milk or a combination of these. From there, add a sweetener to balance flavor and support texture, then use vanilla, cocoa, fruit or other ingredients to create the flavor you want.
This method freezes the dairy base in small portions before blending. The frozen pieces give the blender a thick, cold base to process, helping the mixture turn smooth and creamy before it sets up in the freezer.
Yields
4–6 servings
Ingredients
Ice cream:
1½ cups half-and-half
1 cup heavy cream
1 pinch kosher salt
¼ cup sifted powdered sugar
2 teaspoons vanilla extract
Mix-ins (optional):
1 teaspoon instant espresso powder
½ cup mini chocolate chips or semisweet chocolate, finely chopped
1 cup chopped frozen fruit, such as sliced strawberries or chopped peaches
½ cup chopped toasted almonds
½ teaspoon mint extract, or to taste
Tools
Blender
Ice cube trays
Ice cream scoop
Spoon
Spatula
Glass or metal loaf dish
Plastic wrap
Freezer-safe airtight container
Prep Time
2 minutes, plus 2 hours for freezing the half-and-half and cream
Total Time
3 minutes, plus 4 hours for freezing

1. Freeze the dairy base
Start by freezing the half-and-half and heavy cream so the blender has cold, solid pieces to process into a thick, creamy texture.
Use ice cube trays: Pour the half-and-half and heavy cream into ice cube trays, filling each compartment evenly so the cubes freeze and blend more consistently.
Freeze until solid: Place the trays in the freezer until the dairy cubes are fully frozen, about 2 hours.
Work quickly once frozen: Remove the cubes from the tray just before blending so they stay firm and cold.
Loosen as needed: If the cubes are difficult to remove, let the tray sit at room temperature for a minute or gently twist the tray before adding them to the blender.
For easier blending, avoid overfilling the trays and break apart any cubes that freeze together before placing them in the blender jar.

2. Add ingredients to blender
Combine the frozen half-and-half and cream, powdered sugar, vanilla extract and salt in the blender jar.
Start low: Secure the lid and begin blending on low or Speed 1.
Increase gradually: Slowly increase to high speed as the ingredients begin to break down.
Blend until smooth: Continue blending until the mixture looks smooth and creamy, about 30 seconds.
Blend in flavor additions: Add ingredients you want fully incorporated into the ice cream base, such as cocoa powder, fruit puree, peanut butter, caramel, espresso powder or extracts, then blend until smooth.
Pulse in smaller mix-ins, if desired: For smaller pieces like mini chocolate chips, finely chopped nuts or crushed cookies, pulse 2 to 3 times on low just until distributed.
Save larger mix-ins for folding: For brownie chunks, candy pieces, larger cookie crumbles, chopped nuts or thick ribbons of fudge, caramel or jam, fold or layer them in after blending and before the final freeze.
If needed, stop the blender and use a spatula to push thick ingredients down toward the blade before continuing.

3. Transfer and finish with mix-ins or toppings
Transfer the blended ice cream to a freezer-safe container or a glass or metal loaf pan right away so it stays cold and is ready for the final freeze.
Fold in larger mix-ins: If you saved chunkier ingredients for after blending, gently fold in brownie pieces, candy pieces, cookie crumbles, chopped nuts or other larger add-ins.
Layer in swirls: For fudge, caramel, jam, peanut butter or fruit sauce, add part of the ice cream to the container, spoon or drizzle the swirl over top, then repeat with the remaining ice cream.
Gently swirl, if desired: Drag a butter knife or spatula through the layers a few times to create ribbons without fully mixing them in.
Add toppings before freezing: Sprinkle extra cookies, nuts, chocolate chips or candy pieces over the top if you want a finished look when serving.
Work quickly: Move the container to the freezer before the soft ice cream base begins to melt.

4. Place in freezer
Cover the ice cream before placing it in the freezer for the final set.
Protect the surface: Press plastic wrap directly against the surface of the ice cream to help preserve the texture.
Freeze until firm: Cover the container and freeze until the ice cream is firm enough to scoop, about 2 hours.
Store for later: Keep the ice cream in the freezer for up to 1 week.

5. Serve
Let the ice cream sit at room temperature for 5–10 minutes if it feels too firm straight from the freezer, then scoop and serve.
Use a warm scoop: Run an ice cream scoop under warm water, then dry it before scooping to help glide through firmer ice cream.
Serve it simply: Enjoy it on its own in a bowl or cone to highlight the flavor of the base.
Build a sundae: Layer scoops with hot fudge, caramel sauce, whipped topping, chopped nuts, sprinkles or maraschino cherries.
Pair with desserts: Serve alongside brownies, cookies, pie, cake or fruit crisps for an easy homemade dessert.
Add fresh contrast: Top with berries, sliced peaches, bananas or roasted cherries for color and fruit-forward flavor.
Return any leftover ice cream to the freezer promptly so it stays firm and scoopable for later.
Shop KitchenAid® Pure Power Blenders
KitchenAid® Pure Power Blenders give you greater control over texture, helping you create everything from smoothies and frozen drinks to homemade blender ice cream, sauces, dips, soups and shakes. Use the Precision Speed Control Knob + Pulse to adjust the speed as ingredients blend and achieve your preferred consistency.
Choose from models with a 68 oz plastic jar for larger batches, a 62 oz glass jar for sweet and savory recipes or a personal blending jar for cold creations on the go. Powerful blades, dedicated Smoothie, Ice Crushing and Clean Cycle settings and a Heat Release Vent add versatility for frozen treats, everyday blends and supported hot recipes.
Tips for making creamy blender ice cream
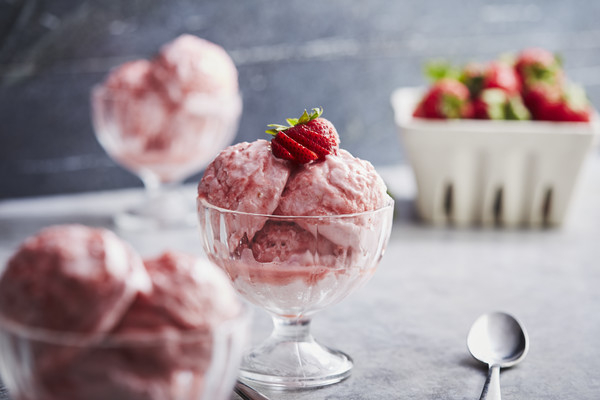
Creamy blender ice cream depends on the right balance of fat, sweetener, freezing method and blending time. Higher-fat bases like heavy cream or full-fat coconut milk can create a richer texture, while sugar helps keep the frozen mixture from becoming too hard.
Water content matters, too. Ingredients like fresh fruit can add flavor and color, but watery fruits may make ice cream freeze harder or icier unless they’re balanced with creamier ingredients.
Use these tips to help make blender ice cream smoother, easier to scoop and more enjoyable to serve.
1. Start with a creamy base
A creamy base gives blender ice cream more body and helps create a smoother finished texture.
Choose higher-fat ingredients: Heavy cream, half-and-half, whole milk or full-fat coconut milk can help create a richer consistency.
Balance lighter bases: If you use lower-fat milk or water-rich ingredients, pair them with creamier additions like banana, yogurt, coconut cream or nut butter.
Use enough sweetener: Sugar, maple syrup, honey or another sweetener helps balance flavor and can make the frozen texture easier to scoop.
Be mindful with fruit: Berries, peaches, mango and other fruits add flavor, but too much water can lead to an icier texture. Use ripe fruit and balance it with cream, coconut milk or another creamy ingredient.
2. Try a custard-style base for richer texture
If you want a richer consistency, try a custard-style ice cream base made on the stovetop. Custard bases often include egg yolks and dairy, which can add body and create a smoother finished texture when chilled, frozen and blended. For a custard-base recipe, see this guide on how to make ice cream.
Cook and chill the custard: Follow your recipe, then chill the base completely before freezing.
Freeze in small portions: Pour the chilled custard into ice cube trays so the pieces are easier to blend evenly.
Blend with a little liquid: Add the frozen custard cubes to the blender, then blend with a small amount of milk or cream if needed.
Freeze again to set: After blending, transfer the ice cream to a freezer-safe container and freeze until scoopable.
3. Freeze the base in small portions
Freezing the ice cream base before blending gives the blender cold, solid pieces to process into a thick, creamy mixture.
Use ice cube trays: Pour the chilled base into trays so it freezes into smaller pieces that are easier to blend than one large block.
Freeze until solid: Make sure the cubes are fully frozen before blending so the mixture stays cold and thick.
Break up frozen pieces: Separate any cubes that freeze together before adding them to the blender jar.
Keep it cold: Add the frozen base to the blender just before blending so it stays firm and doesn’t begin to melt on the counter.
4. Blend only until smooth
Over-blending can warm the mixture and cause the frozen base to loosen or melt before it reaches the freezer. Blend just until the ice cream looks smooth and creamy, then transfer it to a freezer-safe container right away.
Start on low: Begin blending on low or Speed 1 to help pull the frozen pieces toward the blade.
Increase gradually: Slowly raise the speed as the mixture begins to break down.
Pause as needed: If the base is too thick, stop the blender and use a spatula to move ingredients toward the blade before continuing.
Avoid running too long: Stop once the mixture is smooth, thick and creamy rather than continuing to blend.
Select KitchenAid® Pure Power Blender models offer manual texture control with the Precision Speed Control Knob + Pulse, giving you more control when working with thick frozen bases.
5. Add liquid carefully
A small amount of liquid can help the blender process a thick frozen base, but too much can make the mixture loose or icy after freezing.
Add a splash at a time: Use small amounts of milk, cream, coconut milk or another liquid only if needed to get the blades moving.
Use reserved base when possible: Save a little of the chilled liquid base to help blend the frozen cubes.
Stop once blended: Avoid thinning the mixture more than necessary so it stays thick before the final freeze.
6. Store properly for the best texture
Blender ice cream can freeze firmer than churned ice cream, so storage and serving make a difference.
Use a shallow container: A shallow, freezer-safe container helps the ice cream freeze more evenly.
Protect the surface: Press plastic wrap or parchment directly against the ice cream before sealing to help preserve the texture.
Let it soften before scooping: If the ice cream feels too firm straight from the freezer, let it sit at room temperature for 5–10 minutes before serving.
Use a warm scoop: Run an ice cream scoop under warm water, then dry it before scooping to help glide through firmer ice cream.

Blender ice cream FAQs
Blender ice cream is flexible, but the method works a little differently than churned ice cream. These answers cover texture, storage, dairy-free options and other ways to make frozen desserts at home.
What are the pros and cons of making ice cream in a blender?
Making homemade ice cream in a blender is one of the simplest ways to put together a classic frozen treat at home. It’s especially useful when you want a smaller batch, faster prep and easy customization.
Pros: Blender ice cream is quick to prepare, uses simple ingredients and gives you room to customize flavors, sweeteners and mix-ins. It’s a good fit for small batches, experimenting with toppings or making a frozen dessert without a dedicated ice cream machine.
Cons: Blender ice cream may not have the same texture as slow-churned ice cream because it incorporates air differently and doesn’t continuously stir as it freezes. It can freeze harder or turn icier if the base is too low in fat, too low in sugar or not stirred or blended well.
When to choose another method: If you want a more classic churned texture, larger batch size or a more hands-off freezing process, a dedicated ice cream maker may be a better fit. The KitchenAid® Ice Cream Maker Attachment, sold separately for compatible stand mixers, churns the ice cream base as it freezes to help create a smoother, more traditional texture. For more guidance on setup, churning and freezing, learn how to use the KitchenAid® Ice Cream Maker Attachment.
How do you make creamy dairy-free ice cream?
You can make creamy dairy-free ice cream in a blender by choosing ingredients with enough body, such as full-fat coconut milk, bananas, mango, avocado or nut butter. Avoid relying only on high-water fruits, which can make the texture icier.
Dairy-free blender ice cream: Use full-fat coconut milk, oat milk or almond milk as the base, then add a sweetener and flavor ingredients like cocoa, vanilla, fruit or nut butter.
Vegan ice cream: Choose plant-based milk or coconut cream, then add vegan-friendly mix-ins like chocolate chips, nuts, fruit or caramel-style sauces made without dairy. For more guidance, explore how to make vegan ice cream.
Fruit-based nice cream: Blend frozen bananas with mango, berries, cocoa or nut butter for a thick, fruit-forward dessert. Learn more about making nice cream in a blender.
What are different ways to make ice cream?
There are so many different ways you can make ice cream at home. You can make ice cream using a food processor, a hand mixer, a blender or using a KitchenAid® stand mixer with the Ice Cream Maker Attachment.
Blender: Use a blender to combine a liquid base or process a frozen base into a smooth, creamy texture.
Food processor: A food processor can process frozen fruit, frozen dairy cubes or thicker mixtures into a scoopable frozen dessert.
Hand mixer: Use a hand mixer to whip cream or mix a no-churn base before freezing.
Stand mixer with attachment: A compatible KitchenAid® stand mixer with the Ice Cream Maker Attachment can churn ice cream, gelato or sorbet for a more traditional frozen dessert texture.
How do you store homemade blender ice cream?
Store homemade blender ice cream in the freezer in a shallow, airtight freezer-safe container for up to 1 week. Press plastic wrap or parchment directly against the surface before sealing to help protect the texture and reduce ice crystals.
For the best quality, keep the container tightly sealed and return it to the freezer as soon as you’re done serving. Let the ice cream soften at room temperature for 5–10 minutes before scooping if it feels too firm straight from the freezer. If you’re adding crunchy toppings, consider adding some fresh at serving time so they keep more texture.
Can I use frozen fruit to make ice cream in a blender?
Yes, frozen fruit can be used to make blender ice cream or nice cream. For a creamier texture, pair frozen fruit with banana, full-fat coconut milk, heavy cream, yogurt, nut butter or another ingredient with body.
Frozen berries, mango, peaches and bananas can work well, but very watery fruits may create a more icy result. If the mixture is too thick to blend, add small splashes of milk, cream or dairy-free milk until the ingredients move through the blender.
Can blender ice cream be used for milkshakes?
Yes, blender ice cream can be used for milkshakes. Blend scoops of ice cream with milk until smooth, then adjust with more milk for a thinner shake or more ice cream for a thicker texture.
For more step-by-step guidance, explore how to make a milkshake in a blender.