
Earthy and malty with a touch of sharpness, the complex flavors of rye bread are surprisingly easy to capture at home. Learn how to make this flavorful bread in your kitchen with these tips and tricks, along with this sweet rye bread recipe you can make with your KitchenAid® Stand Mixer and accessories. 1
1. Sold separately
Easy homemade rye bread recipe for a stand mixer
Easy homemade rye bread recipe for a stand mixer
What is rye bread?
Rye bread is a yeasted loaf made with a combination of rye grain flour and all-purpose flour or bread flour. Rye flour has a stronger flavor and a higher fiber content than typical bread flour, so the more rye used in your loaf, the denser your bread will be.
You can make rye bread with different varieties of rye flour along with various additives for lighter or darker loaves.
What does rye bread taste like?
Rye bread has a deep, earthy flavor with some bittersweet nuttiness. Caraway seeds typical of American rye bread lend a sharpness with notes of licorice, while rye flour tempers the bread with a malty base.
You can easily fine-tune the flavor by adjusting the amount of caraway seeds as well as using different rye flours or playing with the rye-to-bread flour ratios. If you prefer a bit more color and a smoky depth of flavor, you can substitute molasses for sugar. The exact ingredients often come down to personal preference, and there are many ways to customize your recipe to find your favorite type of rye bread.
Types of rye bread
The five basic types of rye bread are light, medium, dark, pumpernickel and marble. The differences come down to the type of rye flour used.
Light rye bread: Light rye bread uses flour made from the starchy endosperm of the rye grain. Since it doesn’t contain any of the husk or bran, light rye flour lends a subtler, slightly sweeter taste along with a lighter color and texture to your bread. Light rye bread tastes similar to a loaf of wheat bread.
Medium rye bread: A mix of the two flours, medium rye bread flour contains mostly endosperm with a bit of husk and bran. If you opt for marbled rye, the taste will be similar as it’s a mix of light and dark.
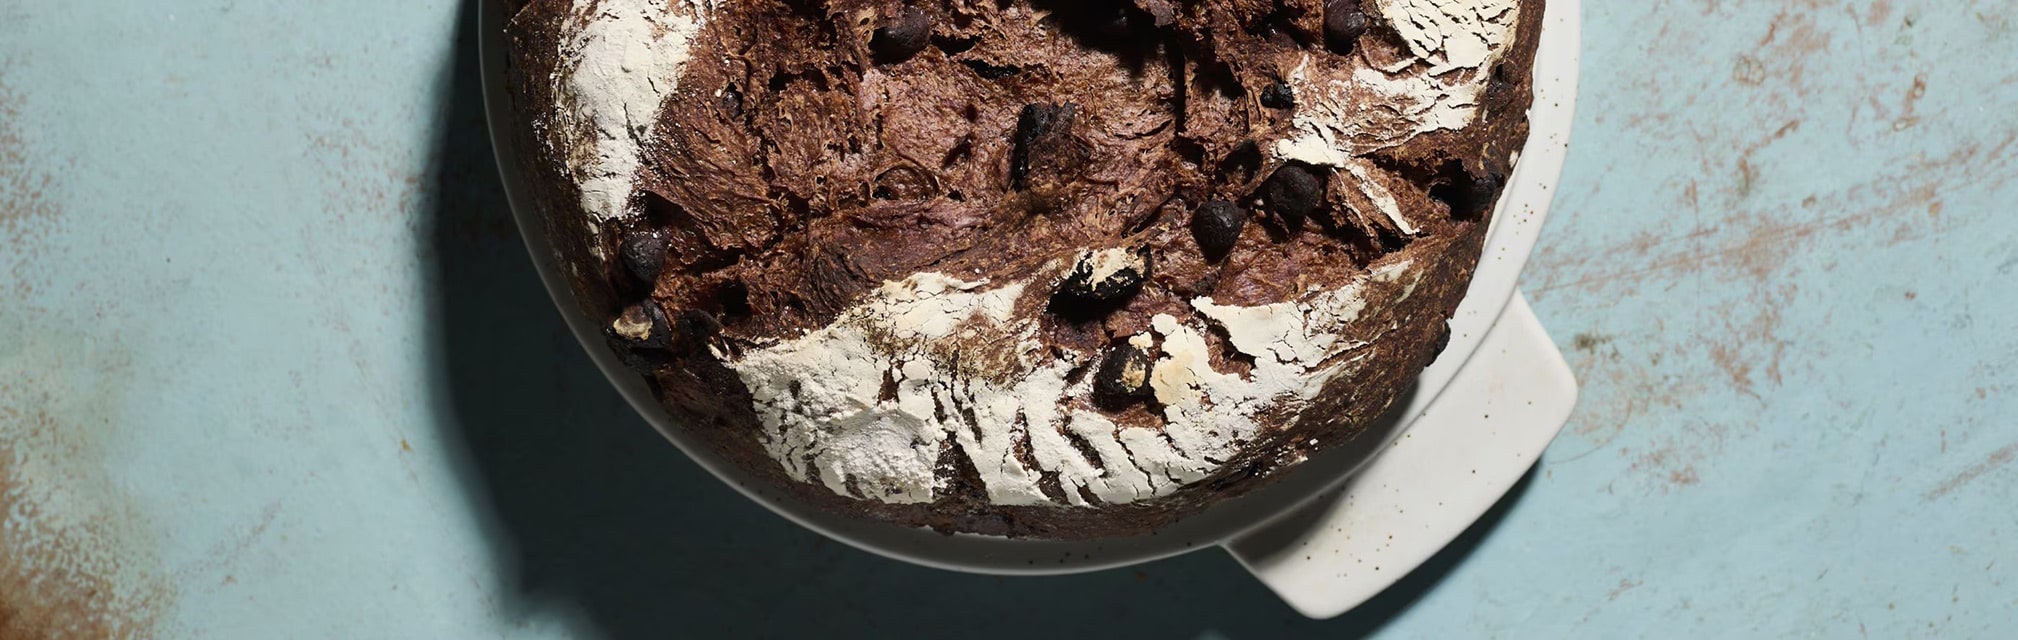
Dark rye bread: Made from flour that uses whole rye grain kernels, dark rye bread has the darkest color, strongest flavor and densest texture. Though not quite as strong or thick as pumpernickel, dark rye bread carries more of the characteristic malty and earthy flavors of rye. Some dark rye bread recipes call for additions like molasses, cocoa powder or even instant coffee to add coloring and depth.
Pumpernickel bread: Pumpernickel bread uses whole rye grain flour and is the strongest and densest of all the varieties.
Marble rye bread: marble rye is a combination of light and dark rye bread that has a marbled color when you slice into it. This loaf pairs the subtle sweetness of light rye with the malty dark of dark rye to create a delicious balance of flavors.
The benefits of rye bread
A typical serving of rye bread contains more fiber than a typical serving of wheat or white bread according to the USDA Food Data Central. It is also higher in certain vitamins and minerals such as phosphorus and magnesium than white bread. Beyond nutrition, rye bread has other benefits such as its ability to be easily transformed by the addition or omission of other ingredients. The flavors of rye pair well with both sweet ingredients like fruit or molasses as well as savory additions like leeks and sea salt.
Rye bread vs. whole wheat
The main difference between rye and whole wheat bread is the type of flour used to make the dough. Whole wheat bread uses wheat flour, while rye bread uses rye flour. The type of flour that is used impacts the flavor and density of each loaf. Rye bread is often denser than whole wheat bread and has a strong, earthy flavor. Wheat bread is typically light and has a mild, more subtle flavor.
How to make rye bread
To make your rye bread, start by combining yeast, sugar, melted butter, eggs and milk. The sugar acts as a catalyst for the yeast so the mixture should be left to sit for several minutes. This resting period gives the yeast a chance to bloom. Next, simply add the rest of your ingredients and mix, then knead your dough.
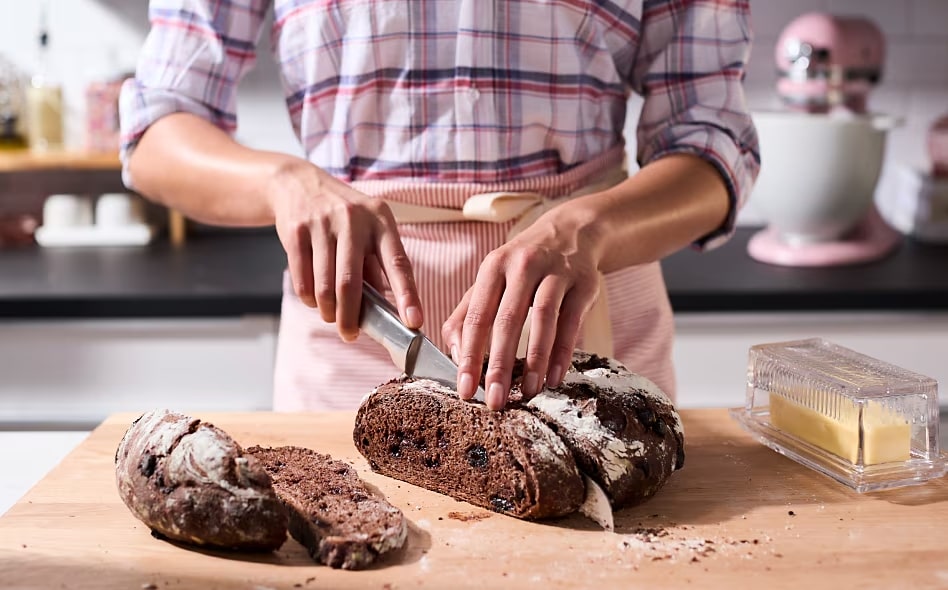
Yeasted breads like homemade rye bread need to be proofed for around an hour or more. Then gently knead it one more time, shape it and place it on your bakeware and bake per your recipe instructions. If you’re making a non-traditional loaf, check your recipe instructions for the best time to add your special ingredients. Here’s an overview of a chocolate cherry rye bread recipe that’s right at home on a dessert plate. This recipe uses a KitchenAid® Stand Mixer and the Bread Bowl with Baking Lid1 accessory.
1. Sold separately
Rye bread ingredients
A basic rye bread recipe can be a canvas for your imagination. Try adding sweets like chocolate and dried fruit, nuts and seeds for extra crunch or just enjoy a simple rustic loaf with a bit of butter. Here are some common ingredients you’ll want to have on hand when making basic rye bread:
Sugar
Egg
Butter
Milk
Salt
Rye flour
All-purpose flour
Caraway seeds (optional)
Vegetable oil
Yields
8 servings
Prep time
2 hours
Total time
3 hours
Kitchen tools needed to make rye bread
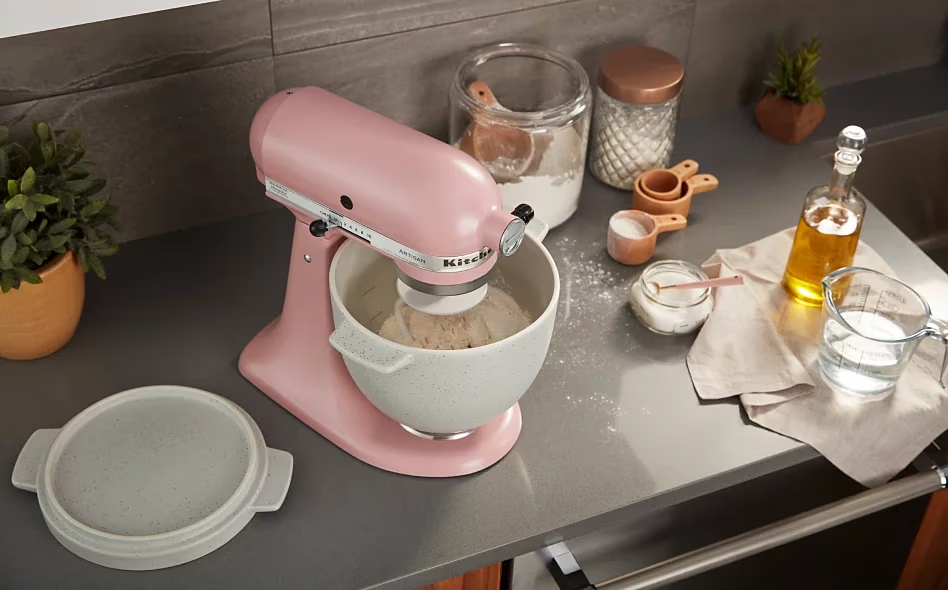
Stand mixer, like the KitchenAid® Artisan® Series 5 Quart Tilt-Head Stand Mixer
Dough hook, like the KitchenAid® Dough Hook accessory
Scale or measuring cups
Proofing bowl with cover
Parchment paper
Bakeware
Upgrade your kitchen tools
Make the job even easier and a bit less messy with a stand mixer and specialized accessories. Here are some tools from KitchenAid brand that can help:
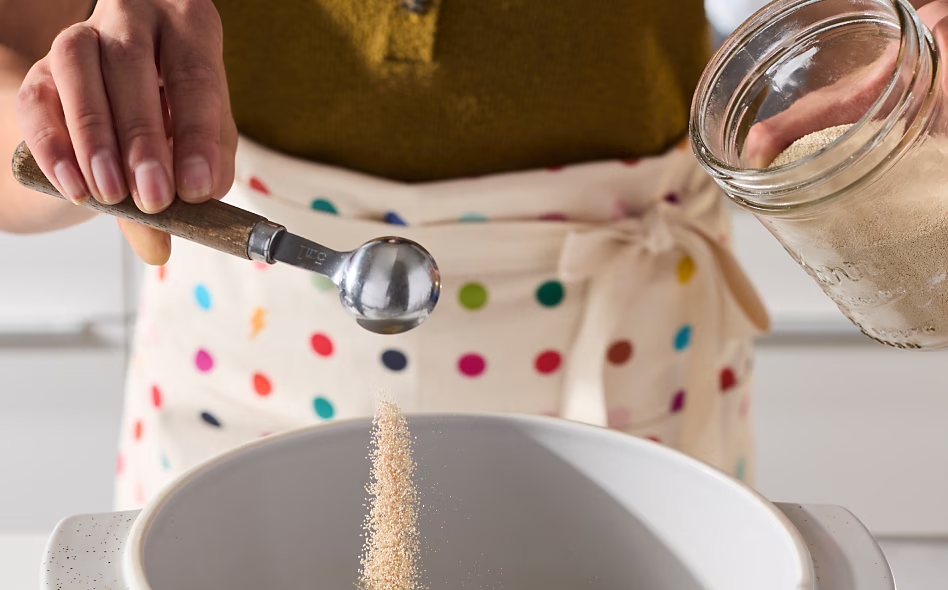
The KitchenAid® Sifter + Scale Attachment1 weighs and then adds dry ingredients to your mixer bowl, ensuring you get the right amounts for precise baking.
The KitchenAid® Bread Bowl accessory pairs perfectly with select KitchenAid® tilt-head stand mixers and allows you to mix, knead, proof and even bake all in the same bowl.
1 Sold separately
Step 1: Prep the ingredients
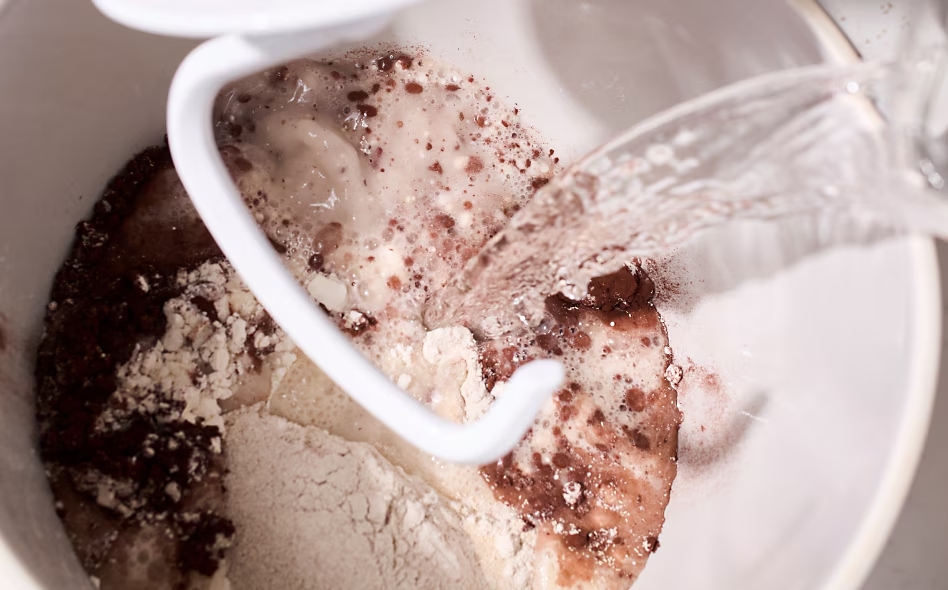
Before making your bread, gather your equipment and ingredients. Fill the KitchenAid® Bread Bowl accessory with hot water, then empty it and pat dry. This will help create a warm environment to encourage the yeast to bloom.
Step 2: Add ingredients and knead
Add all ingredients except the cherries and chocolate to your stand mixer and attach the Dough Hook accessory. Set your stand mixer to speed 2 and let the mixer do the work for you. After 30 seconds, add dried cherries and chocolate and continue to knead. When the dough begins to slap the side of the bowl, it’s ready for the next step.
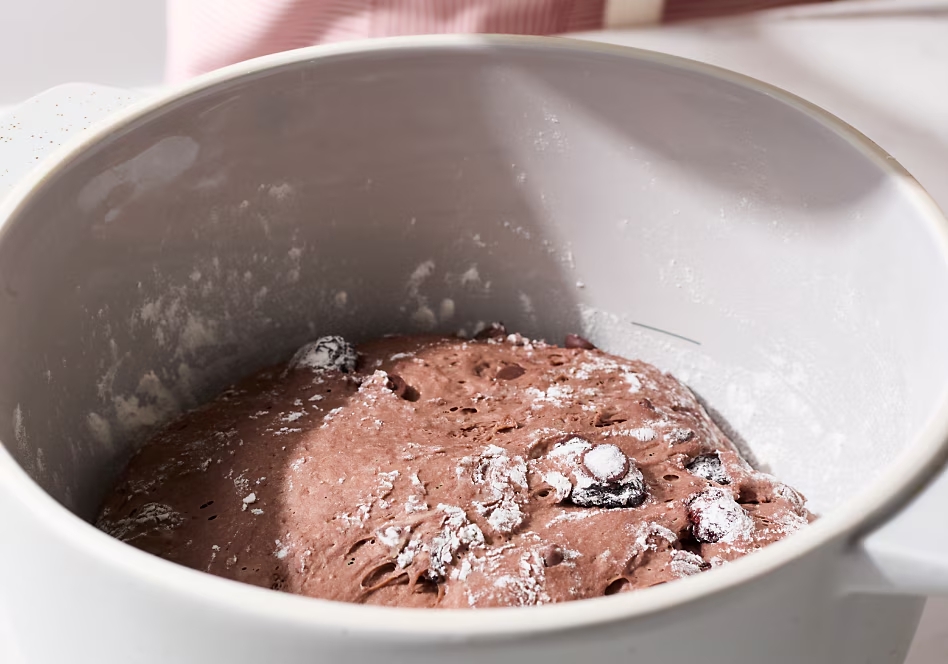
Step 3: Proof the rye bread dough
Remove the Bread Bowl accessory from the stand mixer and cover it with the Baking Lid. It’s best to keep your dough in a warm place while it rises. Proofing should take around 1 ½ -2 hours for this type of dough.
Step 4: Knead and form the dough
Gently knead the dough on a floured surface and shape into a round mound. Place the mound back into the Bread Bowl and cover it with the lid. Proof it again for another 30 minutes before baking. Now is a good time to preheat your oven per the recipe settings.
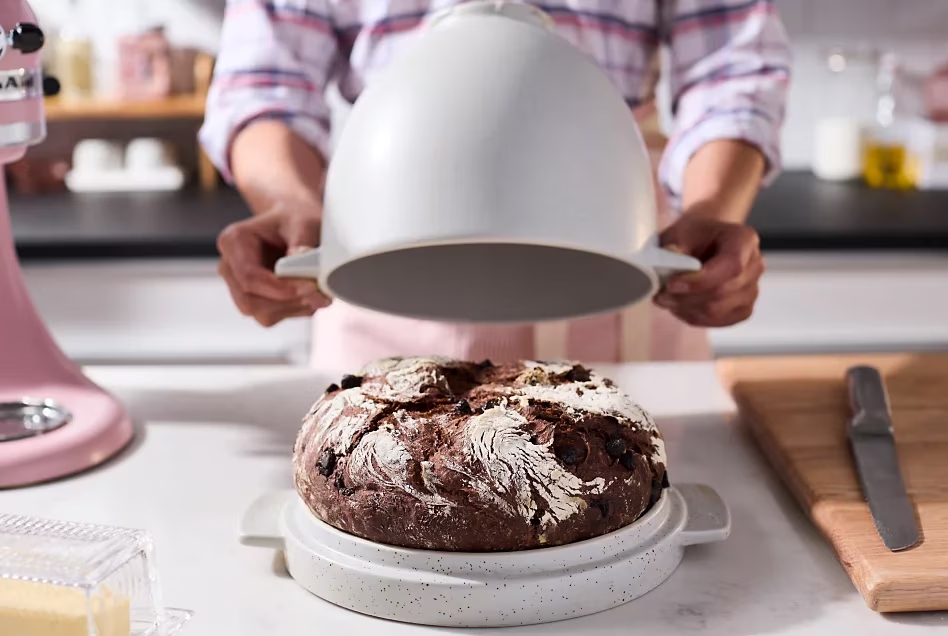
Step 5: Bake the bread
Turn the bowl over with the loaf on Baking Lid and bake according to your recipe instructions.
Rye bread baking tips
Homemade rye bread shouldn’t be intimidating, though you’ll be very busy trying out all the different types and flavor combinations. To make the best homemade rye bread, follow the tips and tricks below.
Weigh your flour: This is a good idea no matter what you’re baking since weighing will be more accurate than measuring volume.
Don’t over-knead rye bread dough: Follow your recipe instructions on the kneading time for rye dough and don’t overdo it.
Don’t overhandle the dough: If you over-knead or handle rye bread dough too much, it can become tough and lead to dense bread. Using the KitchenAid® Bread Bowl accessory lets you mix, knead, proof and bake in the same bowl for minimal transfer and handling.
Skip caraway if going sweet: To help your sweet additions stand out, you might want to skip the caraway seeds found in a typical rye bread recipe.
Line bakeware with parchment paper: You may want to line your bakeware with parchment paper to prevent sticking and for easier cleanup.
Let bread cool slightly before slicing: As your bread cools, the structure inside firms up. Let the bread set before slicing off a piece.
Freeze your rye bread to keep it fresh: If you don’t plan to slice into it the first day, or need to make rye bread several days ahead of an event, you can freeze the bread in an airtight container. Revive it in the oven or a toaster to restore its crusty exterior and chewy inside..