


 New Code Sent!

What are the parts of a stove?
The broiler, warming drawer, oven racks, burners, control panel, temperature knobs, drip bowls and thermostat are all parts of your stove, also known as a range, that work together to help you create your favorite recipes. Knowing how to use the various parts of your stove can help you be more inventive in the kitchen.
Use this guide to better understand the parts of your range and how each one functions.


10 parts of kitchen range
Whether you’re shopping for a new range or simply want to know more about the current cooking and baking hub of your kitchen, you can discover some of the common parts of a stove below.

1. Broiler
A broiler is a heating element typically located at the top of the oven cavity that emits intense, direct heat. The broil element generates high temperatures to cook the top of your food.
Broilers can be used to sear fish, meat and vegetables or to create a golden crust on a cheesy baked pasta dish. The broil setting on your stove’s control panel cooks food at temperatures up to 550ºF on many models.

2. Warming drawer
Warming drawers, also known as baking or proofing drawers, are typically found on the bottom of some ranges and can be used for a few purposes. This stove component can help yeasted dough rise before baking and can keep cooked meals warm before you serve them. Note that some oven drawers may just be storage drawers. Consult your owner’s manual if you’re unsure.
You can use a warming drawer to proof homemade sandwich bread before it goes into the oven to bake or keep appetizers like cheesy crab dip warm and bubbly until party guests arrive. Some baking drawers can even be used as a slow cooker.

3. Oven racks
Oven racks hold baking trays and pans pie plates and Dutch ovens in the proper position for baking, roasting and broiling. These racks are adjustable, allowing you to position them as close to or far from the oven heating element as your recipe requires.
The lower position is ideal for setting pie crusts and roasting meats, while the highest position is great for browning and crisping. In convection ovens, rack placement may matter less thanks to the fan that circulates air throughout the oven cavity.

4. Burners and coils
On your stove, you will typically find 2-5 gas burners covered by metal grates or electric heating elements that are used to heat pots, pans and cooktop accessories like griddles or grill pans. Your stove’s burners can help you create delicious omelets, fluffy pancakes, juicy hamburgers and much more. Use this guide to learn how to remove your stove’s burners or coils to clean or for replacement.

5. Temperature knobs
Your stove’s temperature knobs are typically located on either the outer edge of the appliance, on the front, or on the back of the stove next to the control panel. These knobs help you quickly adjust the heat levels of your gas burners or electric heating elements so you can go from boiling to simmering with a simple flick of the wrist.

6. Drip bowls
To protect your cooktop from burnt-on spills and splatters, drip pans are found on some models around the stove’s burners or coils. These bowls are designed to catch the messes that come with creating a new recipe to help make cleaning easier.

7. Control panel
Located on either the back or front of your appliance, the range control panel allows you to select cook temperatures, timers and bake settings like broiling. Most control panels also feature an oven light function that allows you to peek in on your creations during the baking process without having to open the oven door.

8. Thermostat
A stove thermostat helps to regulate the heat inside your oven’s cavity to help keep temperatures consistent throughout the baking process. The thermostat works together with the control panel to let you know when your oven has finished preheating and is ready to cook your meal.

9. Oven door
Most oven doors have a window so you can see inside the oven without opening it and monitor your food. The door gives you easy access to your food, whether you’re baking, roasting or broiling.

10. Convection fan
If your oven features convection cooking, you’ll likely find a fan at the back of the oven cavity that moves hot air throughout, helping maintain even temperatures across multiple racks.
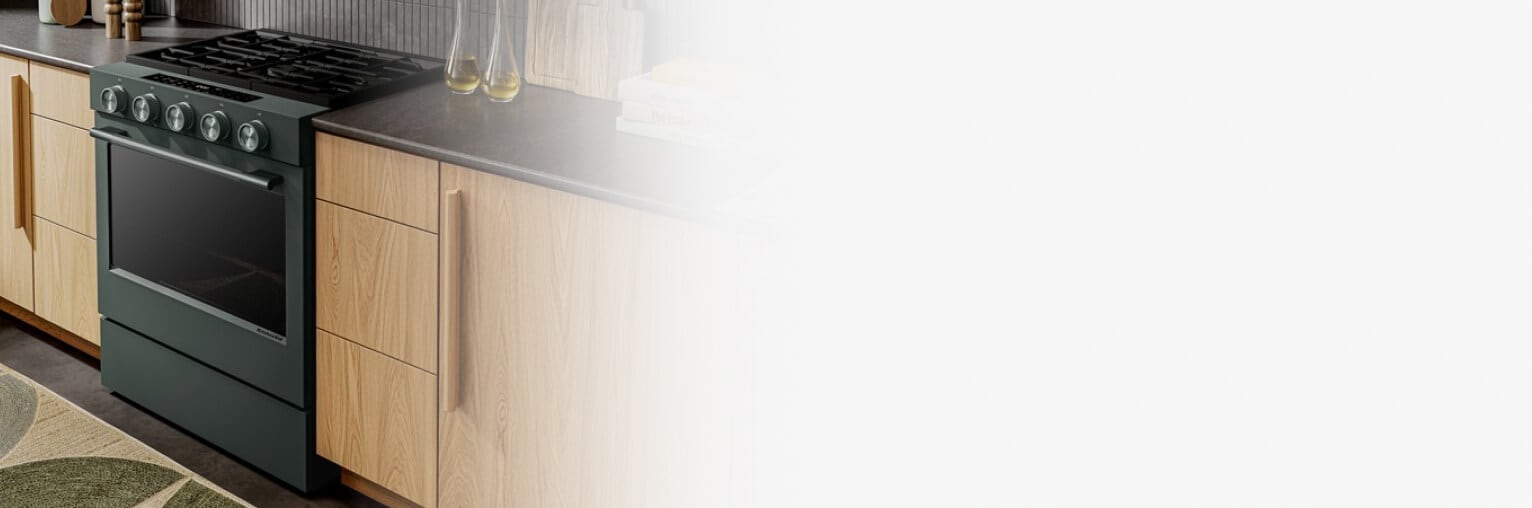
Shop customizable KitchenAid®ranges
KitchenAid® ranges can add style to your kitchen. Some models, like this KitchenAid® slide-in range, are designed to be personalized with a curated palette of exterior finishes and mixed metal hardware. Pick from serene Juniper, warm Black Ore and classic Stainless Steel finishes, all with matching handles and knobs. Personalize your hardware with optional handle and knob accessory kits in Brass, Bronze, Black Ore and Stainless Steel.


Electric vs. gas range parts
Because gas and electric ranges use different heating methods, their parts differ slightly. Gas ranges use an open flame both on the stovetop and inside the oven, so these models include flame igniters and require a gas line for installation. Learn how to change your gas stove hookup to prep for an electric model.
Electric ranges generate heat with electric heating elements. The cooktops typically feature flat, glass-ceramic covered heating elements or metal heating coils rather than burners. Inside the oven, electric ranges house metal coils that generate a dry heat.


How to clean stove parts
You can clean the parts of a glass stovetop with a cooktop or oven cleaning solution, a scrubbing pad and paper towels. Before cleaning your gas grates and burner caps, check your owner’s manual or user guide. Every range is unique, and specific care instructions may apply to your model. Here are pointers for cleaning both types of stove parts.

Electric glass stovetop tips
Let the cooktop surface cool completely before wiping away spills or splatters.
Once cleaned, use a damp cloth to remove any remaining soap or cleaner residue.
Finish by polishing with a microfiber cloth to help reduce streaks and restore shine.

Gas stovetop tips
Remove grates and burner caps and soak them in hot, soapy water for at least 20 minutes.
Use a soft-bristled brush to clean hard-to-reach spots.
For stubborn stains, make a baking soda paste (3 parts baking soda to 1 part water), apply to the parts, let sit, then scrub and rinse.
Some ovens offer self-cleaning features for inside the oven cavity that can be used to lighten the load of cleaning so you can get your range ready for your next creation.


Where to buy stove parts
It’s important to only buy replacement parts that are compatible with the make and model of your current stove. Some replacement parts should only be installed with the help of a licensed technician, so you may need to schedule a service to swap out the parts.
If you need to replace parts of your KitchenAid® stove, you can browse the entire line of cooktop and range accessories to find the right part for your appliance.
KitchenAid® ranges
A range for every kitchen
Explore slide-in and freestanding ranges crafted for performance and style to help you create your favorite recipes
Shop KitchenAid®ranges
Whether you’re shopping for a gas or electric stove, KitchenAid brand offers a wide selection of ranges designed to fit your cooking style. Explore select models with features like Even-Heat™ True Convection for crisp flaky pastries and caramelized veggies or the Steam Rack that provides additional moisture during the baking process to find the right appliance for your home.


Your subscription was successful
Thank you for signing up. Keep an eye on your inbox for our next newsletter.
Stay Connected – Join the List
Enjoy articles like this? Get helpful guides and appliance care tips sent straight to your inbox.
